infiniti q50 manual transmission

The Infiniti Q50 offers a manual transmission option‚ catering to driving enthusiasts who prefer precise control and a sporty feel in a luxury sedan․

1․1 Overview of the Infiniti Q50

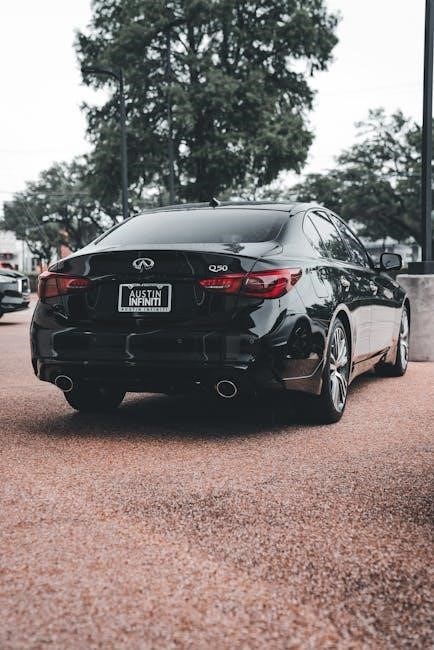
The Infiniti Q50 is a luxury sedan known for its blend of performance‚ advanced technology‚ and refined design․ It features powerful engine options‚ a sleek interior‚ and innovative systems like the InTouch infotainment system․ With a focus on driver engagement and comfort‚ the Q50 appeals to those seeking a premium driving experience․

1․2 Importance of Manual Transmission in the Q50

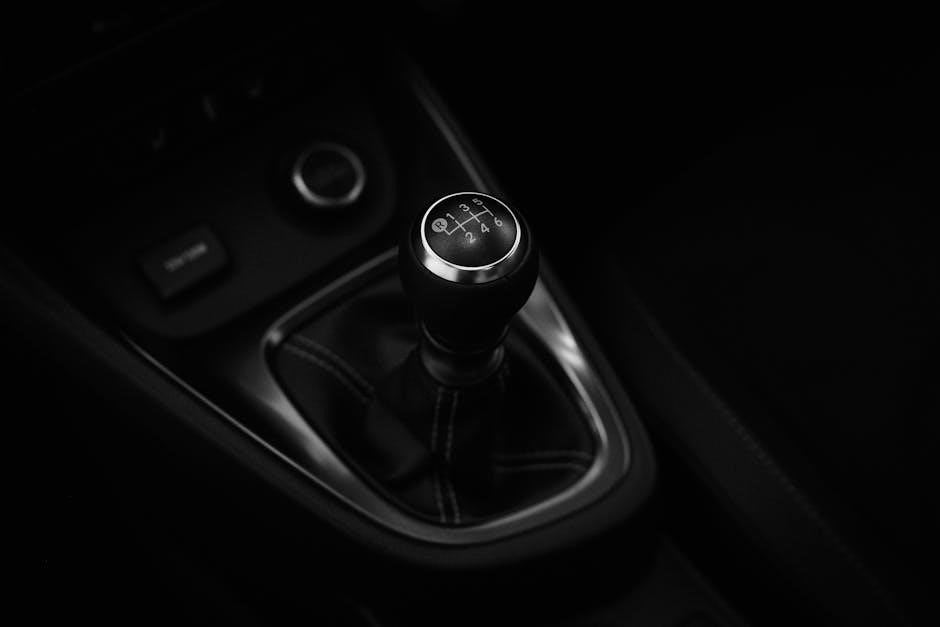
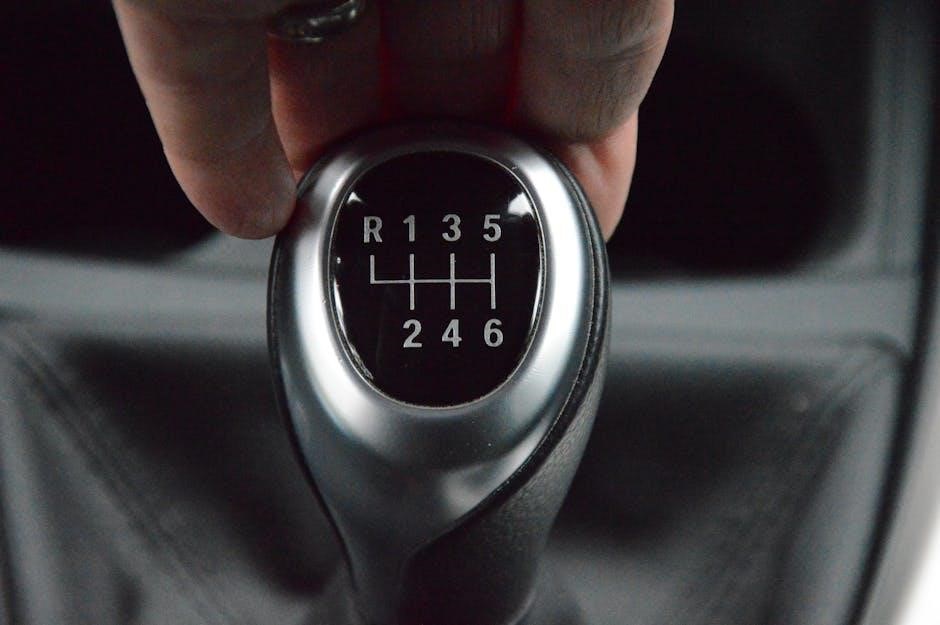
The manual transmission in the Infiniti Q50 is a sought-after feature for driving enthusiasts‚ offering precise control and a sporty feel․ It enhances the overall driving experience by providing a more direct connection to the vehicle․ For those who value engagement and a dynamic drive‚ the manual option stands out as a preferred choice‚ appealing to purists who enjoy the art of shifting gears․

History of Manual Transmission in the Infiniti Q50

The Infiniti Q50 introduced its manual transmission option in 2013‚ offering a sporty driving experience․ However‚ the feature was eventually phased out in later models․

2․1 Evolution of Manual Gearboxes in Infiniti Vehicles

Infiniti’s manual gearboxes evolved over years‚ starting with the G37 and Q50 models․ Early versions focused on precise shifting and driver engagement․ Later models refined this design‚ though the feature was eventually discontinued due to declining demand and shifting market preferences toward automatic transmissions․ This shift mirrored broader industry trends․

2․2 Discontinuation of Manual Transmission in Later Models

The manual transmission option was phased out in later Q50 models due to low demand and shifting consumer preferences toward automatic transmissions․ This decision aligned with broader industry trends favoring convenience and technology over traditional driving experiences․ Despite its discontinuation‚ the manual Q50 remains a sought-after choice for driving purists who value a more engaging behind-the-wheel experience․

Availability of Manual Transmission in the Infiniti Q50

The manual transmission was available in select Q50 models‚ primarily during its early production years‚ offering a sporty driving experience․

3․1 Model Years Offering Manual Transmission

The Infiniti Q50 offered manual transmission primarily in its early years‚ specifically the 2016 to 2019 models‚ including the Q50 3․0t Sport․ This option was available for rear-wheel-drive variants‚ enhancing driving dynamics and providing a sporty experience for enthusiasts․

3․2 Trim Levels with Manual Transmission Option

The manual transmission in the Q50 was predominantly featured in the Sport trim level‚ particularly for the 3․0t models; This setup was designed to deliver a more engaging and responsive driving experience‚ appealing to drivers who value precision and control behind the wheel․

Performance and Driving Experience

The Q50 with a manual transmission delivers a sporty feel‚ offering precise control over acceleration and responsive handling‚ making it a favorite among driving enthusiasts․

4․1 Acceleration and Handling with Manual Transmission

The Infiniti Q50 with a manual transmission excels in acceleration and handling‚ offering a sporty experience․ Drivers can enjoy precise control over gear shifts‚ enhancing responsiveness and agility on the road․ This setup is particularly appealing to enthusiasts who value a more engaging driving experience in a luxury sedan․

4․2 Comparison with Automatic Transmission Models

The manual transmission in the Infiniti Q50 offers a more engaging and sporty driving experience compared to automatic models․ While automatics provide convenience and smooth acceleration‚ the manual version delivers better fuel efficiency and driver control‚ appealing to enthusiasts who prefer a hands-on connection with the vehicle․

Common Issues and Reliability

The Infiniti Q50 manual transmission has faced reports of vacuum leaks and synchronizer wear‚ impacting performance and durability․ Regular maintenance is crucial to mitigate these issues․

5․1 Known Problems with the Manual Transmission

The Infiniti Q50 manual transmission has been reported to experience issues such as vacuum leaks‚ which can cause unmetered air intake and engine performance problems․ Additionally‚ some drivers have noted synchronizer wear‚ leading to difficulty in shifting gears smoothly․ These issues may arise over time‚ especially with high mileage or aggressive driving conditions․ Regular maintenance is essential․

5․2 Reliability Compared to Other Transmissions

The manual transmission in the Infiniti Q50 is less reliable compared to its automatic counterparts‚ often experiencing issues like synchronizer wear and vacuum leaks․ While it offers a sporty driving experience‚ it requires more maintenance and attention․ Automatic transmissions in the Q50 are generally more durable and preferred for a hassle-free experience‚ making them a better choice for long-term reliability․ Regular maintenance can help extend its lifespan․

Maintenance and Care

Regular maintenance is crucial for the longevity of the Infiniti Q50’s manual transmission․ Schedule oil changes‚ fluid checks‚ and inspect the clutch and gear components periodically․

6․1 Recommended Maintenance Schedule

The Infiniti Q50’s manual transmission requires regular maintenance to ensure optimal performance․ Schedule oil changes every 5‚000 to 7‚500 miles and inspect the transmission fluid annually․ Replace worn clutch components and check gear engagement․ Follow the manufacturer’s guidelines for timing belt replacements and other critical components․ Customizable maintenance intervals can be set via the “Other” option in the vehicle’s system․ Always consult the owner’s manual or a certified technician for precise recommendations․

6․2 Tips for Extending Transmission Life

To extend the life of your Infiniti Q50’s manual transmission‚ avoid aggressive driving and rapid shifting․ Regularly check transmission fluid levels and replace the filter as recommended․ Use high-quality lubricants and monitor for leaks․ Avoid extreme temperatures and ensure proper clutch engagement․ Schedule annual inspections with a certified technician to identify potential issues early․

Manual Transmission vs․ Automatic Transmission

The Infiniti Q50’s manual transmission offers drivers enhanced control and a more engaging experience compared to automatic models‚ appealing to enthusiasts who value precision and sporty performance․

7․1 Pros and Cons of Manual Transmission

The manual transmission in the Infiniti Q50 offers enhanced driver engagement and precision‚ with better fuel efficiency in specific driving conditions․ However‚ it may lack the convenience of automatic models and has limited availability across trim levels․ Additionally‚ manual transmissions can experience wear on components like the clutch over time‚ requiring periodic maintenance to ensure optimal performance․

7․2 Why Choose Manual Over Automatic

Choosing a manual transmission in the Infiniti Q50 offers a more engaging and sporty driving experience‚ with better control over gear shifts and acceleration․ It also tends to be more fuel-efficient in specific driving conditions and is generally more cost-effective than automatic models․ However‚ it may lack the convenience of an automatic and requires more driver effort in heavy traffic․

Resale Value and Popularity

The Infiniti Q50 with a manual transmission holds a unique appeal‚ particularly among driving enthusiasts‚ which can enhance its resale value compared to automatic models․

8․1 Impact of Manual Transmission on Resale Value

The manual transmission in the Infiniti Q50 can positively influence resale value due to its rarity in luxury sedans‚ appealing to driving enthusiasts․ This unique feature often retains value better than automatic models‚ as it caters to a niche market of purists seeking a more engaging driving experience․

8․2 Popularity Among Enthusiasts

The Infiniti Q50 with a manual transmission is highly sought after by driving enthusiasts‚ who appreciate the precision and control it offers․ This feature enhances the sporty driving experience‚ making it a favorite among those who value a more hands-on connection to the road․ Its exclusivity further boosts its appeal within this passionate community․

Tuning and Modifications

The Infiniti Q50 manual transmission offers potential for tuning‚ with engine performance enhancements and suspension upgrades being popular modifications to optimize driving dynamics and overall performance․

9․1 Popular Modifications for Manual Q50

Popular modifications for the manual Q50 include engine tuning‚ lightweight wheels‚ and sport-tuned suspension systems․ Enthusiasts often upgrade air intake systems and exhaust manifolds to enhance power delivery․ Additionally‚ installing a high-performance clutch and short-throw shifter improves shifting precision and acceleration response‚ making the driving experience more engaging and responsive for enthusiasts․

9․2 Performance Enhancements

Performance enhancements for the manual Q50 often focus on optimizing power and handling․ Upgrading to a cold air intake and high-flow exhaust systems can improve engine efficiency․ Tuning the ECU to adjust fuel injection and ignition timing enhances horsepower and torque; Additionally‚ lightweight components and aerodynamic kits can reduce weight and improve downforce‚ maximizing overall performance and driving dynamics for enthusiasts seeking a sportier experience․

Comparison with Competitors

The Infiniti Q50’s manual transmission stands out among luxury sedans‚ offering precise control and sporty driving dynamics‚ making it a compelling choice against competitors like BMW and Mercedes-Benz․

10․1 Manual Transmission Options in Competing Luxury Sedans

Competitors like BMW’s 3 Series and Mercedes-AMG C-Class offer manual transmissions‚ but the Infiniti Q50 stands out with its sporty driving experience and precise control‚ balancing luxury and performance․

10․2 How the Q50 Stands Out

The Infiniti Q50 distinguishes itself through its refined manual transmission system‚ offering a seamless driving experience that combines sportiness with luxury․ Its precise gear shifts and responsive handling set it apart in the competitive luxury sedan market‚ appealing to enthusiasts who seek both performance and elegance․

Owner Reviews and Feedback

Owners praise the Q50’s manual transmission for its engaging drive and precise control‚ though some note occasional stiffness in shifting․ Overall‚ feedback highlights a balance of sportiness and luxury․

11․1 Positive Aspects Highlighted by Owners

Owners frequently commend the smooth‚ precise shifting and responsive acceleration of the Q50’s manual transmission․ Many appreciate the direct connection to the car‚ enhancing the driving experience․ The manual option is seen as a standout feature‚ offering a sporty feel that complements the Q50’s luxurious interior and advanced features․ It’s a favorite among driving enthusiasts seeking both performance and refinement․

11․2 Common Complaints and Concerns

Some owners have reported issues with the manual transmission‚ including occasional difficulty in shifting gears smoothly‚ particularly in cold weather․ Others mention a slightly notchy feel during quick shifts․ Additionally‚ concerns about the long-term reliability of the manual transmission compared to automatic models have been raised‚ though overall‚ most owners find the manual option reliable and enjoyable for spirited driving․

Special Editions and Unique Models

The Infiniti Q50 Red Sport and Nismo editions stand out with exclusive features‚ combining luxury with high performance‚ while limited edition models offer unique styling and enhancements․

12․1 Q50 Red Sport with Manual Transmission

The Q50 Red Sport combines the excitement of a manual transmission with a powerful V6 engine‚ delivering a thrilling driving experience․ Its sport-tuned suspension and aggressive styling make it a standout choice for enthusiasts seeking both performance and luxury․ The manual gearbox enhances driver engagement‚ making the Red Sport a favorite among those who value precision and control․

12․2 Limited Edition Models

Limited Edition Models of the Infiniti Q50 often feature exclusive styling‚ premium interiors‚ and advanced technology․ These special editions are designed to stand out‚ offering a unique blend of luxury and performance․ While manual transmission options may be rare in these models‚ they remain highly sought after by enthusiasts for their exclusivity and enhanced driving experience․

The Infiniti Q50 manual transmission offers a unique driving experience‚ appealing to purists who value control and precision․ Available in specific model years‚ it combines luxury with sporty handling‚ though reliability and maintenance should be considered for long-term ownership․

13;1 Final Thoughts on the Infiniti Q50 Manual Transmission

The Infiniti Q50 manual transmission delivers a dynamic driving experience‚ blending sporty precision with luxury․ While it appeals to enthusiasts seeking control‚ its availability is limited‚ and maintenance should be considered․ For purists‚ it offers a unique connection to the road‚ though potential buyers should weigh its benefits against practicality and long-term reliability․

13․2 Recommendations for Potential Buyers

Potential buyers considering the Infiniti Q50 manual transmission should test drive the model to assess its fit for their lifestyle․ Ensure regular maintenance to preserve transmission health․ For performance enthusiasts‚ the manual Q50 offers unique driving engagement․ However‚ those prioritizing convenience may prefer automatic variants․ Research certified pre-owned options for reliability and value․

waters 2695 manual

Overview of the Waters 2695 Manual

The Waters 2695 manual provides a comprehensive guide for the Alliance e2695 Separations Module, detailing its setup, operation, and maintenance․ It covers key features like the quaternary pump and vacuum degasser, ensuring optimal HPLC performance․ The manual also includes safety precautions, installation steps, and troubleshooting tips, making it essential for users to maximize efficiency and safety in their chromatography workflows․

1․1 Key Features of the Waters 2695 Separations Module

The Waters 2695 Separations Module features a quaternary, low-pressure mixing pump for precise solvent delivery and inline vacuum degassing for efficient operation․ It supports high-performance chromatographic separations with compatibility for various detectors, including the Acquity PDA detector․ The module also includes advanced automation capabilities and user-friendly controls, ensuring accurate and reproducible results in HPLC analysis․

1․2 Importance of the Manual for HPLC Operations

The manual is crucial for optimal HPLC operations, providing detailed instructions for setup, operation, and maintenance of the Waters 2695․ It ensures users understand safety protocols, troubleshooting, and calibration processes, minimizing downtime and enhancing data accuracy․ Adhering to the manual’s guidelines is essential for maintaining instrument performance and achieving reliable chromatographic results in laboratory settings․

Installation and Setup

The manual provides a comprehensive guide for installing and setting up the Waters 2695, ensuring proper configuration and safety․ It outlines essential steps for initial operation․

2․1 Quick Start Guide for the Waters 2695 Separations Module

The quick start guide offers a concise setup process for the Waters 2695, enabling users to rapidly initiate operations․ It includes connecting components, software installation, and initial calibration steps to ensure smooth functionality from the start, minimizing downtime and optimizing efficiency for immediate use․

2․2 Installation Category and Safety Precautions

The Waters 2695 manual emphasizes safety with an Installation Category rating and overvoltage protection․ Users must conduct a hazard analysis, especially with flammable solvents, ensuring proper ventilation․ Handling hazardous materials requires adherence to disposal guidelines․ Safety protocols are critical to prevent accidents and ensure compliance with laboratory standards during installation and operation of the Waters 2695 Separations Module․

Operating the Instrument

The Waters 2695 manual details manual and automated optimization, calibration, and data acquisition modes, including full scan and single ion recording (SIR) for precise chromatography operations․

3․1 Manual and Automated Instrument Optimization

The Waters 2695 manual provides detailed steps for both manual and automated optimization of the instrument․ Manual optimization allows users to adjust parameters like flow rates and gradients for specific methods․ Automated optimization streamlines the process, ensuring consistency and efficiency․ The system also supports MS operating systems, enabling advanced calibration and data acquisition modes such as full scan and single ion recording (SIR)․ This ensures precise and reliable chromatography results while minimizing downtime and improving analytical consistency․

3․2 Full Scan and Single Ion Recording (SIR) Data Acquisition

The Waters 2695 supports full scan and Single Ion Recording (SIR) modes for precise data acquisition․ Full scan mode captures a wide range of m/z values, providing comprehensive chromatographic data․ SIR mode focuses on specific ions, enhancing sensitivity for targeted analysis․ Both modes integrate seamlessly with MS systems, allowing users to switch between detailed and focused data collection, ensuring versatility in chromatographic and mass spectrometry applications․

Maintenance and Troubleshooting

Regular maintenance ensures optimal performance of the Waters 2695․ Tasks include replacing rotor seals, checking pump performance, and cleaning injectors․ Troubleshooting guides help resolve common issues efficiently․

4․1 Routine Maintenance Tasks for the Waters 2695

Regular maintenance is crucial for the Waters 2695 to ensure optimal performance․ Key tasks include replacing rotor seals every 3 months, cleaning the autosampler, and checking the pump’s performance․ Additionally, users should inspect and replace worn-out parts like O-rings and valve components․ Following the recommended maintenance schedule helps prevent downtime and maintains data integrity․

4․2 Common Issues and Troubleshooting Steps

Common issues with the Waters 2695 include error messages related to overvoltage categories and pump performance․ Troubleshooting steps involve checking electrical connections, verifying solvent levels, and ensuring proper calibration․ For persistent issues, users should consult the manual or contact Waters support․ Regular maintenance, such as replacing rotor seals and inspecting valve components, can prevent many of these problems, ensuring smooth operation and accurate results․

Waters 2695 Alliance Training Notes

Waters 2695 Alliance training notes provide detailed guides for optimal system operation, including manual and automated optimization, data acquisition, and troubleshooting․ Free downloads are available․

5․1 Training Resources and Guides

Waters offers comprehensive training resources for the 2695 Alliance system, including downloadable PDF guides and manuals․ These materials cover instrument setup, operation, and maintenance, ensuring users can optimize performance and troubleshoot effectively․ Additionally, training notes and user guides are available for free, providing detailed insights into system functionality and best practices for chromatography workflows․

5․2 Free Download Options for PDF and Text Files

Free downloadable resources for the Waters 2695 manual are available online, including PDF and text files․ Users can access guides like the Quick Start Guide, Operating Manual, and Troubleshooting Guide from sources like Labrecycling․com and Waters․com․ These documents provide detailed instructions and support for instrument operation, maintenance, and repair, ensuring users have easy access to essential information for optimal system performance․

Safety Considerations

Safety is crucial when operating the Waters 2695․ Hazard analysis and precautions for flammable solvents are emphasized․ Proper handling and disposal of hazardous materials are detailed in the manual to ensure user and laboratory safety․

6․1 Hazard Analysis and Flammable Solvent Precautions

Hazard analysis is critical when using the Waters 2695, especially with flammable solvents․ The manual recommends assuming a maximum leak of 10 LC eluate into the lab atmosphere․ Proper precautions, such as using explosion-proof equipment and ensuring good ventilation, are essential․ Users must adhere to safety guidelines to minimize risks associated with solvent handling and system operation, ensuring a safe working environment․

6․2 Handling and Disposal of Hazardous Materials

Proper handling and disposal of hazardous materials are crucial when working with the Waters 2695․ Always use personal protective equipment (PPE) and follow lab safety protocols․ Dispose of waste according to local regulations and environmental guidelines․ The manual provides specific instructions for managing hazardous substances, ensuring compliance with safety standards and minimizing environmental impact․

Waters e2695 Manuals and User Guides

The Waters e2695 manuals and user guides are available for free PDF download, providing detailed instructions for setup, operation, and maintenance․ These resources ensure optimal performance and safety, covering all aspects of the system․ Visit waters․com or labrecycling․com to access these essential documents․

7․1 Available Manuals for Free PDF Download

The Waters e2695 manuals are readily available for free PDF download, ensuring easy access to essential documentation․ These include the Waters 2695 Separations Module Quick Start Guide, Operating Manual, and Troubleshooting Guide․ Users can download these resources from waters․com or labrecycling․com, providing comprehensive support for setup, operation, and maintenance of the system․

7․2 Waters Alliance e2695 Separations Module Documentation

The Waters Alliance e2695 Separations Module documentation provides detailed operational and technical insights․ It includes installation guides, troubleshooting tips, and maintenance schedules․ Users can access these resources on the Waters Corporation website, ensuring comprehensive support for optimal system performance and longevity․ These documents are essential for maximizing the efficiency of the e2695 module in various chromatography applications․

PDA Detector and Its Functionality

The PDA detector offers high sensitivity and a broad wavelength range, enabling full spectral data acquisition․ It seamlessly integrates with the Waters 2695 system for precise analysis․

8․1 Acquity PDA Detector Specifications

The Acquity PDA detector offers high sensitivity and a broad wavelength range of 190-800 nm․ It provides full spectral data acquisition and a high sampling rate of up to 100 Hz, ensuring detailed chromatographic analysis․ Its compact design integrates seamlessly with the Waters 2695 system, enhancing flexibility in method development and routine analysis․

8․2 Integration with the Waters 2695 System

The Acquity PDA detector integrates seamlessly with the Waters 2695 system, enhancing its analytical capabilities․ It supports dual-wavelength monitoring and full spectral data acquisition, ensuring compatibility with the system’s advanced features․ Controlled by Waters’ Empower software, the detector optimizes chromatographic workflows, offering precise data analysis and method development․ This integration ensures synchronized operation, maximizing the system’s performance in high-efficiency separations and detection․

valve Operations and Needle Wash Cycle

Valve Operations and Needle Wash Cycle

Valve operations and the needle wash cycle are critical for maintaining the Waters 2695’s performance․ The process involves specific valve actions and needle movement to prevent contamination and ensure precise sample handling, optimizing chromatographic results․

9․1 Detailed Steps for Valve Operations

Understanding valve operations is crucial for maintaining the Waters 2695’s performance․ Valve 1 closes to isolate the loop, followed by the needle wash pump activating․ Valve 4 opens, allowing the needle to move into the bottom seal․ Valves 3 and 2 then open, venting the loop to waste, ensuring precise sample handling and preventing contamination․ These steps are essential for consistent and accurate chromatographic results․

9․2 Needle Wash Pump and Loop Isolation Process

The needle wash pump activates to clean the needle, ensuring sample integrity․ Valve 1 closes, isolating the loop, while Valve 4 opens to direct the needle into the bottom seal․ Valves 3 and 2 then open, venting the loop to waste․ This process prevents carryover and contamination, maintaining precise sample injection and system performance․ Regular execution of this cycle is vital for optimal instrument functionality and longevity․

Downloads and Additional Resources

Waters 2695 manuals and guides are available for download on Waters․com․ Key documents include the Quick Start Guide and full operating manual, ensuring comprehensive support․

10․1 Accessing Manuals and Guides from Waters․com

Visit Waters․com to access a variety of manuals and guides for the Waters 2695 Alliance system․ Key resources include the Quick Start Guide, operating manual, and troubleshooting documentation․ These materials are available in PDF format, ensuring easy download and reference․ Additionally, the website provides comprehensive support documentation to help users optimize their HPLC operations and maintain system performance effectively․

10․2 Waters Alliance e2695 Support Documentation

The Waters Alliance e2695 support documentation offers comprehensive resources, including user guides, maintenance schedules, and troubleshooting tips․ These materials are designed to assist users in optimizing the performance of their HPLC system․ Detailed instructions for routine maintenance, such as rotor seal replacement and pump care, are provided to ensure longevity and reliability․ Additionally, the documentation includes specific guidelines for operating the quaternary pump and vacuum degasser, enhancing overall system efficiency․

The Waters 2695 manual is an essential resource for optimal HPLC system performance, offering detailed guidance on operation, maintenance, and troubleshooting to ensure precise and reliable results․

11․1 Summary of Key Points

The Waters 2695 manual is a comprehensive resource for HPLC operations, detailing setup, maintenance, and troubleshooting․ It ensures optimal performance, safety, and efficiency․ Key points include training notes, PDA detector integration, and routine maintenance schedules․ The manual also provides guidance on handling hazardous materials and troubleshooting common issues, making it indispensable for users seeking reliable chromatography results and system longevity․

References

Key sources include Waters․com for official documentation and Labrecycling․com․ References also cite the Waters 2695 Alliance Quick Start Guide and Operating Manual for detailed instructions․

12․1 Waters Corporation and Labrecycling․com Sources

Primary sources include official documentation from Waters․com and secondary resources from Labrecycling․com․ These sites offer detailed guides like the Waters 2695 Alliance Quick Start Guide and Operating Manual․ Additionally, Waters․com provides safety data, troubleshooting tips, and maintenance schedules․ Labrecycling․com offers refurbished equipment manuals and user guides, ensuring comprehensive access to information for optimal instrument performance and compliance with manufacturer guidelines․

hayward vari flo valve manual

The Hayward Vari-Flo Valve is a high-quality control valve designed for swimming pool systems, offering precise water flow management and durability. Available in XL and Multiport models, it ensures efficient pool operation and maintenance. This manual provides essential guidance for safe installation, operation, and troubleshooting, ensuring optimal performance and longevity of the valve.

1.1 Overview of the Hayward Vari-Flo Valve

The Hayward Vari-Flo Valve is a versatile and durable control valve designed for swimming pool systems. It enables precise water flow regulation and is compatible with various pool configurations. Available in XL and Multiport models, the valve supports efficient filtration, backwashing, and winterization. Its robust design ensures long-term reliability, making it a preferred choice for pool professionals and homeowners seeking effective water management solutions.

1.2 Importance of the Manual for Proper Operation

The manual is crucial for safe and effective operation of the Hayward Vari-Flo Valve. It provides detailed instructions for installation, maintenance, and troubleshooting, ensuring optimal performance and longevity. Adhering to the guidelines helps prevent hazards, such as improper valve positioning or pressure issues, which could lead to system damage or safety risks. By following the manual, users can maximize efficiency, maintain pool safety, and extend the valve’s lifespan. Proper usage ensures a secure and reliable pool system operation.

Safety Precautions andWarnings

Always shut off the pump before operating the valve or servicing. Never change valve positions while the pump is running. Keep children supervised and ensure proper electrical grounding to prevent shocks. Use only genuine Hayward replacement parts to avoid hazards. Follow all safety guidelines to maintain system integrity and prevent potential injuries or damage.

2.1 Basic Safety Guidelines

Always turn off the pump before operating or servicing the valve. Never alter valve settings while the pump is running. Ensure all electrical connections comply with local codes and are grounded properly. Keep suction outlets clear of debris to prevent entrapment hazards. Regularly inspect valve components for damage or wear. Supervise children closely when they are near the pool equipment. Follow the manufacturer’s instructions meticulously to avoid potential risks and ensure safe operation.

2.2 Hazards Associated with Improper Use

Improper use of the Hayward Vari-Flo Valve can lead to severe injury or death. Hazards include suction entrapment, mechanical failure, and electric shock. Failure to follow safety guidelines, such as operating the valve with the pump running, can cause violent component separation or evisceration. Improper electrical connections or damaged wiring may result in fatal electric shock. Always ensure components are securely assembled and follow manual instructions to minimize risks.

Types of Hayward Vari-Flo Valves

Hayward offers two primary Vari-Flo Valve models: the XL Series and the Multiport Valve. Each is designed for specific pool system requirements, ensuring optimal performance.

3.1 Vari-Flo XL Series

The Vari-Flo XL Series is a premium line of control valves designed for high-efficiency pool systems. Known for durability and ease of use, these valves feature a robust design suitable for various pool sizes. They offer precise flow control, making them ideal for filtration and cleaning. The XL Series is compatible with sand filters and provides reliable performance, ensuring optimal water circulation and maintenance. Their advanced engineering makes them a top choice for pool professionals.

3.2 Vari-Flo Multiport Valve

The Vari-Flo Multiport Valve is a versatile and durable control valve designed for multi-functional pool systems. It allows for precise control of water flow, enabling functions like filtering, backwashing, and wasting. Known for its reliability and ease of use, the Multiport Valve is ideal for pool owners seeking efficient maintenance and operation. Its advanced design ensures smooth transitions between settings, reducing wear and tear. This valve is a preferred choice for professionals and homeowners alike, offering unmatched performance and longevity in pool systems.

Installation and Setup

The installation process begins with shutting off the pump and positioning the valve correctly. Ensure all connections are secure and follow safety guidelines for electrical setup. Proper alignment and tightening of components are crucial for optimal performance and longevity.

4.1 Pre-Installation Requirements

Before installing the Hayward Vari-Flo Valve, ensure the pool system is turned off and depressurized. Inspect all components for damage or wear. Proper alignment of ports with the pool’s plumbing is essential. Ensure the valve is compatible with your pool’s filter and pump system. Follow manufacturer guidelines for electrical connections and bonding. Prepare necessary tools and replacement parts as specified in the manual to guarantee a safe and efficient installation process.

4.2 Step-by-Step Installation Guide

Position the Hayward Vari-Flo Valve near the pool filter, ensuring proper alignment with plumbing connections. Mount the valve securely using the provided hardware. Align the valve ports with the pool system’s inlet and outlet pipes. Connect the pipes, ensuring tight seals to prevent leaks. Set the valve to the “FILTER” position before starting the pump. Test the system for leaks and proper water flow. Follow the manual for specific configurations and electrical connections.

5.Operating the Hayward Vari-Flo Valve

Operating the Hayward Vari-Flo Valve

The Hayward Vari-Flo Valve operates by rotating its handle to select filter, backwash, or waste modes; Turn the handle to align the pointer with the desired position.

5.1 Starting Up the Valve

To start the Hayward Vari-Flo Valve, ensure the system is properly prepared. Turn off the pump and ensure all valves are in the correct position. Open the manual air relief valve to release any trapped air. Once the pump is started, allow the system to stabilize before adjusting settings. Always refer to the manual for specific startup procedures for your model, such as the SP0710XR50 or SP0715XR50. Proper initialization ensures smooth operation and prevents damage.

5.2 Adjusting Valve Settings

To adjust the Hayward Vari-Flo Valve, turn the handle to align the pointer with the desired position on the index hub. For models like the SP0710XR50 or SP0715XR50, ensure the pump is off before changing settings. Avoid moving the valve while the pump is running to prevent damage. Use the raised portions of the index hubs for precise alignment and smooth operation. Always refer to the specific model’s manual for detailed adjustment instructions. Proper alignment ensures efficient pool system performance.

6;Maintenance and Troubleshooting

Maintenance and Troubleshooting

Regularly inspect the valve for wear, clean debris, and check gaskets for leaks. Address common issues like stuck handles or improper alignment promptly to ensure optimal performance and prevent damage.

6.1 Regular Maintenance Tips

Regular maintenance is crucial for extending the life of your Hayward Vari-Flo Valve. Lubricate gaskets annually with a silicone-based lubricant to ensure smooth operation. Inspect the valve for leaks around gaskets and connections. Clean debris from the valve body and ports to prevent blockages. Check the valve handle alignment and adjust if necessary. Regularly test valve positions to ensure proper function. Winterize the valve by draining water and protecting it from freezing temperatures to avoid damage.

6.2 Common Issues and Solutions

Common issues with the Hayward Vari-Flo Valve include leaks around gaskets, stuck valve handles, and air leaks. To address leaks, inspect and replace worn gaskets. For stuck handles, apply silicone-based lubricant. Air leaks can be resolved by purging air from the system. If the valve fails to cycle properly, check electrical connections and ensure the pump is off during adjustments. Regular maintenance and inspections help prevent these issues, ensuring smooth operation. Always follow manufacturer guidelines for repairs.

7.Differentiating Between Vari-Flo Models

Differentiating Between Vari-Flo Models

The Hayward Vari-Flo XL Series and Multiport Valve differ in design and functionality. The XL Series is known for its durability and ease of use, while the Multiport Valve offers versatile filtering options, making it ideal for various pool configurations.

7.1 Vari-Flo XL vs. Vari-Flo Multiport

The Vari-Flo XL Series is designed for durability and simplicity, typically used with sand filters, while the Multiport Valve offers versatile settings for filtering, backwashing, and waste. The XL Series excels in heavy-duty applications, providing reliable performance. In contrast, the Multiport Valve is ideal for pools requiring multiple functions, such as filtering, rinsing, and draining. Both models ensure efficient pool operation but cater to different needs based on pool size and maintenance requirements.

8.Winterization and Seasonal Care

Winterization and Seasonal Care

Proper winterization ensures the Hayward Vari-Flo Valve remains functional during off-seasons. Drain water by depressing and rotating the valve handle to the winter position, preventing freeze damage. Regular seasonal maintenance includes inspecting and cleaning the valve to maintain optimal performance and longevity, ensuring it’s ready for the next swimming season.

8.1 Draining Water from the Valve

Draining water from the Hayward Vari-Flo Valve is essential for winterization. To do this, depress and rotate the valve handle to align it with the winter position on the index hub. This ensures all water is expelled, preventing freezing and damage. For the Vari-Flo XL Series, follow the same procedure to drain effectively. Regular draining helps maintain valve functionality and extends its lifespan, ensuring smooth operation when the pool season resumes. Proper winter care is critical for system longevity.

8.2 Winterizing the System

Winterizing the Hayward Vari-Flo Valve involves draining all water and protecting it from freezing temperatures. After draining, ensure the valve remains in the winter position. Apply a high-quality pool antifreeze if necessary, especially in extreme climates. Disconnect external components and insulate exposed pipes. Follow manufacturer guidelines for system shutdown and winter preparation to prevent damage. Regular maintenance ensures the valve operates efficiently when the pool reopens, safeguarding against costly repairs and extending its service life. Proper winterization is vital for system longevity.

9.Conclusion

The Hayward Vari-Flo Valve is an essential component for efficient pool operation, offering durability and precise control. By following the manual’s guidelines for installation, maintenance, and winterization, pool owners can ensure optimal performance and longevity. Proper safety precautions and regular upkeep are key to preventing issues and maintaining a safe, enjoyable swimming environment. Adhering to these practices guarantees years of reliable service from the Hayward Vari-Flo Valve, making it a valuable investment for any pool system.

sara meeks exercises pdf

The Sara Meeks Exercises PDF is a comprehensive guide by physical therapist Sara Meeks, focusing on postural correction, bone health, and back pain relief through gentle, effective exercises.

Background of Sara Meeks and Her Method

Sara Meeks is a physical therapist with expertise in osteoporosis management and postural correction. Her method combines therapeutic exercises, yoga, and Pilates to promote bone health and improve posture. With a focus on gentle, skeletally appropriate movements, Meeks’ approach is tailored for individuals with osteoporosis or those seeking to prevent bone density loss. Her exercises emphasize proper alignment, strength, and flexibility, making them accessible to all fitness levels. Meeks’ work has been widely recognized, and her exercises are often recommended by healthcare professionals. The PDF guide provides detailed instructions and illustrations, ensuring users can safely and effectively practice her method at home.

Purpose of the Sara Meeks Exercises PDF

The Sara Meeks Exercises PDF aims to provide a structured program for improving posture, managing osteoporosis, and enhancing overall bone health. It offers a comprehensive guide with detailed instructions and illustrations for each exercise, ensuring users can practice safely and effectively at home. The PDF is designed to help individuals strengthen their bones, reduce back pain, and improve functional movement. It serves as a valuable resource for those seeking to prevent or manage bone-related conditions, offering a holistic approach to health and wellness through targeted exercises and mindful practices. The guide is particularly beneficial for individuals with osteoporosis or those at risk of bone density loss.

Key Concepts of The Meeks Method

The Meeks Method emphasizes postural correction, bone health, and mindful movement, offering a holistic approach to improve posture, reduce pain, and enhance overall well-being safely.

Postural Correction and Its Importance

Postural correction is a cornerstone of The Meeks Method, focusing on aligning the body to reduce strain and prevent injuries. Proper posture enhances breathing, reduces back pain, and promotes long-term spinal health. Sara Meeks’ exercises target the muscles that support the spine, improving both strength and flexibility. By addressing postural imbalances, individuals can reduce the risk of fractures and maintain independence as they age. The method emphasizes mindfulness and body awareness, encouraging sustainable postural habits that contribute to overall well-being and quality of life.

Bone Health and Osteoporosis Management

Sara Meeks’ exercises are specifically designed to support bone health and manage osteoporosis through gentle, non-impact movements. These exercises strengthen the muscles around the spine and hips, reducing fracture risk. The program emphasizes weight-bearing and resistance exercises to improve bone density. By targeting postural alignment, the exercises help distribute body weight evenly, minimizing stress on fragile bones. The Meeks Method is tailored for individuals with low bone mass, offering a safe and effective way to enhance skeletal stability and reduce the progression of osteoporosis while promoting overall bone health and physical resilience.

Exercise Programs in the PDF

The Sara Meeks Exercises PDF outlines structured programs, including the 12-Point Movement Exercise Program, foundational postural exercises, and advanced routines for bone strength and flexibility.

The 12-Point Movement Exercise Program

The 12-Point Movement Exercise Program, developed by Sara Meeks, is a structured and holistic approach to improving posture, strengthening bones, and enhancing overall physical function. This program is designed to address key areas of the body, focusing on alignment, flexibility, and strength. It begins with foundational exercises that target the feet, spine, and pelvis, progressively moving through the body to ensure comprehensive coverage. Each exercise is carefully sequenced to promote proper movement patterns and reduce the risk of injury. The program emphasizes mindfulness and breath awareness, making it accessible for individuals of all fitness levels. By following this program, participants can achieve better posture, reduce back pain, and improve bone health over time.

Foundational Exercises for Postural Improvement

The foundational exercises in Sara Meeks’ program focus on establishing proper alignment and core stability. These exercises target key postural muscles, including those in the feet, pelvis, and spine. Techniques like the “Foot Triangle of Support” help individuals stand and move with better balance. Breathing exercises are also incorporated to enhance body awareness and relaxation. These foundational movements are gentle yet effective, making them suitable for all fitness levels. Regular practice improves posture, reduces muscle tension, and sets the stage for progressing to more advanced exercises. The emphasis is on mindful movement, ensuring long-term postural health and overall well-being.

Advanced Exercises for Bone Strength and Flexibility

The advanced exercises in Sara Meeks’ program are designed to enhance bone density and improve flexibility while maintaining proper alignment. These exercises build on the foundational movements, incorporating more dynamic and weight-bearing activities. Techniques like back-extensor strengthening and weight-bearing movements target the spine, hips, and legs to improve posture and reduce fracture risk. Advanced exercises also focus on functional movements that mimic daily activities, promoting overall bone health and mobility. These exercises are safe for individuals with osteoporosis when performed correctly and can be adapted to suit different fitness levels. Regular practice helps maintain bone strength and flexibility, supporting long-term postural health.

Benefits of The Meeks Method

The Meeks Method improves posture, reduces back pain, and enhances bone health. It promotes mental well-being by increasing confidence and overall physical comfort through safe exercises.

Physical Benefits: Improved Posture and Reduced Pain

The Meeks Method offers significant physical benefits, including improved posture and reduced pain. By targeting the back and hip extensors, these exercises strengthen deep muscles supporting the spine, enhancing alignment and reducing discomfort. The program’s gentle, progressive approach helps individuals with back pain achieve lasting relief while promoting better skeletal alignment. Improved posture not only alleviates pain but also prevents further complications, making daily activities more comfortable and sustainable. The exercises are tailored to be safe and effective, ensuring long-term physical well-being for participants of all fitness levels.

Mental and Emotional Benefits: Enhanced Well-Being

The Meeks Method also offers mental and emotional benefits, enhancing overall well-being. Participants often experience reduced stress and anxiety due to the mindful, holistic approach of the exercises. Improved body awareness and posture can boost confidence and self-perception. The program fosters a sense of control and accomplishment, empowering individuals to manage pain and improve their health. By addressing physical discomfort and promoting relaxation, the exercises contribute to a better mood and emotional resilience. Many users report feeling more positive and motivated, as the method helps reduce fear of movement and builds confidence in daily activities, leading to a more balanced and fulfilling life.

Safety and Precautions

Exercises are designed to be safe and appropriate for all fitness levels. Consult a healthcare professional before starting, especially with severe osteoporosis or injuries. Monitor discomfort and stop if sharp pain occurs. Proper form and breathing are essential to avoid harm and maximize benefits.

Guidelines for Performing Exercises Safely

To ensure safety, start with gentle movements and progress gradually. Avoid sharp pain; mild discomfort is acceptable but should subside within 24-48 hours. Use proper breathing techniques to maintain relaxation and stability. Perform exercises on a firm surface with proper support when needed. If unsure about form or modifications, consult a healthcare professional or certified instructor. Prioritize slow, controlled movements to prevent injury. Stay hydrated and rest when fatigued. Adapt exercises based on individual fitness levels and medical conditions. Always warm up before starting and cool down afterward to enhance flexibility and reduce stiffness. Consistency and patience are key to achieving optimal results safely.

Contraindications and When to Seek Professional Help

Certain conditions may require caution or professional guidance before starting Sara Meeks’ exercises. Individuals with severe osteoporosis, recent fractures, or acute injuries should consult a healthcare provider. Exercises should be avoided during active flare-ups of back pain or if they cause sharp pain, numbness, or tingling. Pregnant women, especially in the first trimester, should seek medical advice. Those with spinal implants or recent surgeries must also consult their physician. If exercises worsen symptoms or cause dizziness, stop immediately and seek professional help. Always prioritize medical clearance for severe or unstable conditions to ensure safety and appropriateness of the program.

Progression and Adaptation

The Meeks Method encourages gradual progression, adapting exercises to individual fitness levels. Start with foundational postural work, then advance to more challenging movements as strength and flexibility improve;

How to Progress Through the Exercise Program

Progression in the Meeks Method involves advancing through exercises based on individual readiness. Start with foundational postures, ensuring proper alignment and control. Gradually introduce more dynamic movements, increasing resistance or depth as strength improves. Pay attention to body feedback; avoid sharp pain. Transition from basic to advanced exercises only when stability and form are mastered. Regular practice and mindfulness are key to safe progression, ensuring each step builds on the previous, fostering long-term postural health and bone strength.

Adapting Exercises for Different Fitness Levels

The Meeks Method offers adaptable exercises for all fitness levels, ensuring safe and effective progression. Modifications include reducing resistance, shortening hold times, or using supportive props like chairs or walls. Advanced individuals can increase intensity with deeper movements or added weights. The program emphasizes proper alignment and control over complexity, allowing participants to tailor exercises to their abilities. This holistic approach ensures that everyone, from beginners to those with higher fitness levels, can benefit without risking injury, promoting long-term postural health and bone strength safely and effectively.

Additional Resources and Support

Visit Sara Meeks’ official website for the PDF, supplementary materials, and webinars. Explore recommended reading lists and contact certified instructors for personalized guidance and support.

Where to Find the Sara Meeks Exercises PDF

The Sara Meeks Exercises PDF is available on her official website, www.sarameekspt.com. It can also be accessed through platforms hosting her webinars and osteoporosis management resources.

Recommended Reading and Supplementary Materials

For deeper understanding, Sara Meeks recommends her book, Walk Tall: An Exercise Program for the Prevention and Treatment of Osteoporosis. Additional resources include webinars and articles on her website, www.sarameekspt.com. Supplementary materials such as instructional videos and workshops further enhance the learning experience. These resources provide comprehensive insights into postural correction, bone health, and the Meeks Method, ensuring a holistic approach to wellness. They are ideal for both beginners and advanced practitioners seeking to optimize their exercise routines and overall well-being through evidence-based practices.

The Sara Meeks Exercises PDF offers a gentle, effective approach to improving posture and bone health, promoting overall well-being through mindful, science-based practices.

Final Thoughts on The Meeks Method

The Meeks Method, developed by Sara Meeks, is a holistic approach to improving posture and bone health through gentle exercises. It emphasizes mindful movements and breath awareness, making it accessible to all fitness levels. The program is particularly beneficial for those managing osteoporosis, as it focuses on strengthening the skeletal system and enhancing balance. Users have reported reduced back pain and improved overall well-being. The method’s adaptability and safety make it a valuable resource for long-term health management. By following the exercises, individuals can achieve better alignment, reduce fracture risks, and maintain an active lifestyle confidently.

michigan medicaid manual

The Michigan Medicaid Manual serves as a comprehensive guide for healthcare providers, outlining program policies, billing procedures, and beneficiary eligibility․ It ensures compliance with state and federal regulations, providing updates to maintain accurate and efficient service delivery․

1․1 Overview of the Michigan Medicaid Program

The Michigan Medicaid Program provides health coverage to eligible low-income individuals and families․ It is administered by the Michigan Department of Health and Human Services (MDHHS) and offers a range of services, including medical, dental, and pharmacy benefits․ The program aims to ensure access to essential healthcare while promoting health equity and financial stability for beneficiaries․ It also includes specialized programs like the Healthy Michigan Plan and MI Choice Waiver, which cater to specific populations with unique needs․

1․2 Purpose and Structure of the Medicaid Manual

The Michigan Medicaid Manual is designed to serve as a detailed guide for healthcare providers, outlining policies, procedures, and requirements for participating in the program․ It is structured to ensure clarity and accessibility, with sections covering eligibility, covered services, billing, and reimbursement․ The manual is regularly updated to reflect policy changes and regulatory requirements, ensuring providers have the most accurate information․ Its purpose is to facilitate efficient and compliant delivery of Medicaid services while maintaining transparency for both providers and beneficiaries․

Eligibility Criteria for Michigan Medicaid

Michigan Medicaid eligibility is based on income, household size, and specific categories like children, pregnant women, and disabled individuals․ Requirements vary to ensure coverage for vulnerable populations․

2․1 Income Requirements and Household Size Guidelines

The income requirements for Michigan Medicaid are based on federal poverty levels, varying by household size․ Eligibility is determined by comparing gross income to these thresholds, with adjustments for dependents and deductions․ Household size includes all individuals claimed on the applicant’s tax return․ Income limits differ for categories like children, pregnant women, and disabled individuals․ These guidelines ensure low-income families and individuals access affordable healthcare while adhering to federal and state regulations․ Accurate household size reporting is crucial for eligibility determination․

2․2 Special Eligibility Categories (Children, Pregnant Women, Disabled Individuals)

Muchigan Medicaid offers specialized eligibility for children, pregnant women, and disabled individuals․ Children under 19 qualify based on household income and family size, with higher income limits than other categories․ Pregnant women are eligible up to 200% of the federal poverty level, ensuring prenatal and postpartum care․ Disabled individuals may qualify through Supplemental Security Income (SSI) or specific disability criteria․ These categories provide targeted support to vulnerable populations, ensuring access to essential healthcare services tailored to their needs․

Provider Enrollment and Participation

Provider enrollment in Michigan Medicaid requires meeting specific criteria, ensuring compliance with state and federal guidelines․ Participation involves delivering covered services and adhering to reimbursement policies․

3․1 Requirements for Becoming a Medicaid Provider in Michigan

To become a Michigan Medicaid provider, applicants must meet specific requirements, including proper licensure, accreditation, and completion of a Medicaid Provider Agreement․ They must also undergo background checks and ensure compliance with federal and state regulations․ Additionally, providers are required to complete APD courses and adhere to program guidelines․ Proper documentation, such as proof of certification and business registration, must be submitted․ Providers must also agree to accept Medicaid reimbursement rates and follow all program policies․ The enrollment process includes submitting an application through the Michigan Medicaid Provider Enrollment portal․

3․2 The Enrollment Process and Necessary Documentation

The enrollment process for Michigan Medicaid providers involves submitting an application through the Michigan Medicaid Provider Enrollment portal․ Required documents include a National Provider Identifier (NPI), Employer Identification Number (EIN), and professional licensure․ Applicants must also provide proof of liability insurance and complete a background check․ The process requires detailed information about the practice, including business address and service offerings․ Once submitted, the application is reviewed for accuracy and compliance with state regulations․ Providers are notified of approval or additional requirements needed․ This ensures proper vetting and maintains program integrity․

Covered Services and Benefits

Michigan Medicaid covers essential healthcare services, including primary care, dental, vision, and home health․ It also offers special programs like MI Choice Waiver and Healthy Michigan Plan benefits․

4․1 Medical Services Covered Under Michigan Medicaid

Michigan Medicaid covers a wide range of medical services, including primary care visits, hospital stays, prescription medications, and maternity care․ It also includes mental health services, dental care, and vision services for eligible beneficiaries․ The program emphasizes preventive care, such as vaccinations and health screenings, to promote early detection and treatment of health issues․ These services are designed to ensure access to essential healthcare, aligning with federal and state guidelines to provide comprehensive coverage for low-income individuals and families․

4;2 Special Programs (MI Choice Waiver, Healthy Michigan Plan)

The MI Choice Waiver provides home and community-based services for individuals with disabilities, allowing them to live independently․ It covers personal care, respite services, and assistive technology․ The Healthy Michigan Plan offers coverage to low-income adults, including primary care, specialty services, and behavioral health benefits․ These programs aim to expand access to care for vulnerable populations, ensuring comprehensive support and promoting health outcomes for Michigan residents․

Billing and Reimbursement Policies

The Michigan Medicaid Manual outlines detailed billing procedures and reimbursement rates for providers․ It ensures accurate claims submission and timely payments, with regular updates to reflect policy changes and compliance requirements․

5․1 Billing Procedures for Medicaid Providers

The Michigan Medicaid Manual details billing procedures for providers, emphasizing accurate claims submission․ Providers must use approved forms, include necessary documentation, and adhere to coding guidelines․ Timely submission is crucial, as delays may result in denied claims․ Electronic claims submission is encouraged for faster processing․ The manual also outlines specific billing requirements for various services, ensuring compliance with federal and state regulations․ Proper billing practices help maintain efficient reimbursement and high-quality care delivery for Medicaid beneficiaries․ Adherence to these guidelines is essential for uninterrupted service provision․

5․2 Reimbursement Rates and Payment Schedules

The Michigan Medicaid Manual outlines reimbursement rates based on a fee-for-service schedule or managed care plans․ Rates are updated regularly to reflect cost changes and policy adjustments․ Providers receive payments according to predefined timelines, ensuring consistent cash flow․ The manual also specifies submission deadlines and documentation requirements for timely reimbursement․ For services under managed care, rates may vary by plan․ Providers can access the latest rate updates through the Medicaid Provider Manual or the Michigan Department of Health and Human Services (MDHHS) website․

Updates and Changes in the Medicaid Manual

The Michigan Medicaid Manual is regularly updated by the Michigan Department of Health and Human Services (MDHHS)․ Recent changes include the April 2025 update, impacting service delivery for some clients․ Providers must stay informed to adapt to policy revisions and ensure compliance with the latest guidelines․

6․1 Recent Policy Updates and Revisions

The Michigan Medicaid Manual has undergone recent updates, including the April 2025 revision by the Michigan Department of Health and Human Services (MDHHS)․ These changes address service delivery modifications and provider requirements, particularly impacting clients of the Arnold Centers in Midland and Gladwin․ Additionally, updates to the MI Choice Waiver program have been implemented, affecting eligibility criteria and benefit packages․ Providers are encouraged to review the latest manual to ensure compliance with new policies and maintain high-quality care for beneficiaries․

6․2 Impact of Federal Medicaid Changes on Michigan Providers

Federal Medicaid changes have significant implications for Michigan providers, potentially affecting reimbursement rates and service delivery․ While Michigan’s Medicaid program serves over 2․5 million residents, federal cuts could reduce funding, impacting provider networks and beneficiary access to care․ The state has implemented measures like the Healthy Michigan Plan to maintain coverage, but ongoing federal policy shifts require providers to adapt to ensure continued quality care and financial stability in the program․

Resources for Providers and Beneficiaries

The Michigan Medicaid Provider Manual and online portals offer detailed guidance, while support services like free testing and enrollment assistance ensure access to care for beneficiaries statewide․

7․1 Accessing the Michigan Medicaid Provider Manual

The Michigan Medicaid Provider Manual is available electronically on the Michigan Department of Health and Human Services (MDHHS) website․ Providers can access it at www․michigan․gov/mdhhs․ The manual is regularly updated to reflect policy changes and is organized into sections covering eligibility, billing, and covered services․ Notifications of updates are distributed to enrolled providers, ensuring they stay informed about the latest guidelines․ Additionally, the manual includes resources for specialized programs like the Healthy Michigan Plan and MI Choice Waiver․

7․2 Support Services for Medicaid Beneficiaries

Medicaid beneficiaries in Michigan can access various support services to assist with program navigation and healthcare needs․ The Michigan Department of Health and Human Services (MDHHS) offers resources such as beneficiary portals and customer service hotlines for inquiries․ Additionally, community health centers provide guidance on eligibility, enrollment, and accessing care․ These services aim to enhance healthcare accessibility and ensure beneficiaries receive the support needed to maintain their health and well-being effectively․

pool test kit instructions

Using a pool test kit is essential for maintaining safe and clear water. These kits help measure key chemical levels, ensuring a healthy swimming environment. Regular testing prevents algae growth and maintains equipment longevity. Whether using test strips or digital testers, accurate results are crucial for balancing chemicals like chlorine and pH. Proper testing ensures a safe and enjoyable pool experience for everyone.

Understanding the Importance of Pool Water Testing

Regular pool water testing is crucial for maintaining a safe and sanitary swimming environment. It ensures balanced chemical levels, preventing harmful bacteria growth and algae blooms. Proper testing also protects equipment from corrosion and extends its lifespan. Key factors like chlorine, pH, and alkalinity must be monitored to avoid eye irritation and respiratory issues. Clear water not only enhances the swimming experience but also indicates a well-maintained pool. Consistent testing habits help prevent costly repairs and ensure a healthy, enjoyable space for everyone. Accurate results are essential for making adjustments and maintaining optimal water quality year-round.

Overview of Pool Test Kits and Their Components

Pool test kits are designed to measure essential chemical levels in water. They typically include test strips, liquid reagents, or digital testers. Test strips have color-changing pads to indicate levels of chlorine, pH, and alkalinity. Liquid kits use droppers and reagents for precise measurements. Digital testers provide instant readings with sensors. Each kit may vary in complexity, offering basic or advanced features. Proper use of these components ensures accurate results, helping maintain safe and balanced pool water. Always follow the manufacturer’s instructions for best performance and reliability.

Types of Pool Test Kits

Pool test kits come in three main types: test strips, liquid test kits, and digital testers. Each offers unique advantages, with test strips being quick and easy, liquid kits providing accuracy, and digital testers delivering fast, precise results.

Test Strips for Chlorine, pH, and Total Alkalinity

Test strips are a popular choice for quick and easy pool water testing. They measure key parameters like chlorine, pH, and total alkalinity. Simply dip the strip into the water and compare the color changes to the provided chart. They are cost-effective and convenient, with options like the AquaChek and EASYTEST 7-Way strips offering accurate results. Ideal for regular monitoring, test strips ensure balanced water chemistry, preventing issues like algae growth or equipment damage. They are widely available, including options like the Premium Home Use 150 Pool Test Strips for seasonal needs.

Liquid Test Kits for Accuracy and Precision

Liquid test kits offer superior accuracy and precision compared to test strips. They involve adding drops or tablets to a water sample, providing detailed readings for chlorine, pH, and alkalinity. Kits like the HTH 6-Way Test Kit or Taylor K-2006 are trusted for their reliability. While more expensive, they deliver consistent results, making them ideal for precise chemical balancing. Regular use ensures optimal water safety and clarity, preventing issues like algae growth or equipment corrosion. They are a preferred choice for pool owners seeking high accuracy and long-term pool maintenance.

Digital Pool Testers for Quick Results

Digital pool testers provide rapid and precise water analysis. These devices use advanced technology to measure chlorine, pH, and other chemicals quickly. Simply fill the tester with pool water, add a tablet, and compare the color change to a chart or use the digital display for instant readings. Kits like the Taylor K-2006 or EASYTEST 7-Way are popular for their accuracy. Digital testers are user-friendly and ideal for pool owners who value speed and convenience, ensuring consistent and reliable water quality monitoring for a safe and clean swimming environment.

Best Practices for Using Pool Test Kits

Consistently test your pool water to ensure safety and clarity. Follow kit instructions precisely, test at the same time daily, and store kits properly to maintain accuracy and reliability.

How Often to Test Your Pool Water

Test your pool water at least 2-3 times a week during peak use and once a week during off-peak times. Always test before and after heavy use, such as pool parties, and after severe weather like storms. Consistent testing ensures chemical levels remain balanced, preventing algae growth and maintaining clarity. For pools with high usage, consider testing every 1-2 days to keep the water safe and sanitary. Regular monitoring is key to maintaining a healthy and enjoyable swimming environment.

How to Collect a Water Sample for Testing

To collect a water sample, scoop water from 12-18 inches deep using a clean container. Avoid surface water, as it may not reflect the pool’s true chemistry. For best results, gather the sample away from skimmers and return jets to ensure it’s representative of the entire pool. Fill the container to the recommended level and test immediately for accurate readings. Never touch the test strips with your hands, as oils can interfere with results; This method ensures reliable data for adjusting chemical levels effectively.

Step-by-Step Instructions for Pool Test Kits

Follow your test kit instructions precisely. Add water to the tester, insert any required tablets, and wait. Compare color changes to the provided chart. Adjust chemical levels as needed.

Preparing the Test Kit and Water Sample

Begin by gathering your pool test kit and ensuring all components are intact. Follow the manufacturer’s instructions to prepare the kit. Collect a water sample from 12–18 inches below the surface, avoiding debris. For accurate results, use a clean, dry container. If using test strips, dip them fully into the water and remove promptly. For liquid kits, fill the comparator to the recommended level. Always handle chemicals and reagents carefully, avoiding contamination. Proper preparation ensures reliable and precise test outcomes.

Conducting the Test and Reading Results

Dip the test strip into the water sample, ensuring all pads are submerged. Hold it level for 2-3 seconds, then remove. Compare the color changes to the chart provided. For liquid kits, add drops to the sample and mix gently; Use the comparator to match colors. Digital testers may require inserting the probe or adding a sample to the device. Always follow the kit’s instructions precisely. Avoid touching the test areas to prevent contamination. Accurate color matching ensures reliable results for chlorine, pH, and alkalinity levels. Record results for future reference and adjustments.

Interpreting Test Results and Adjusting Chemical Levels

After testing, compare your results to the ideal ranges for chlorine (1-3 ppm), pH (7.2-7.8), and alkalinity (80-120 ppm). If levels are off, adjust chemicals accordingly. For low chlorine, add stabilizer or shock treatment. If pH is too high, use a pH decreaser, and if too low, add a pH increaser. For alkalinity, adjust with an alkalinity increaser or decreaser. Always follow product instructions for dosage. Retest after adjustments to ensure balance. Proper adjustments ensure water safety, clarity, and equipment protection.

Factors Affecting Pool Water Test Accuracy

Expired reagents, improper storage, and contamination can affect test accuracy. Calibration errors and interfering substances may also skew results. Always follow kit instructions and maintain equipment properly.

Understanding Interferences in Test Results

Interferences in pool water test results can occur due to contaminants or improper testing techniques. Contaminants like dirt, oil, or algae can skew readings, while expired reagents or incorrect dilution may also affect accuracy. Additionally, certain chemicals in the water, such as high levels of bromine or algaecides, can interfere with test strip reactions or liquid reagent results. Proper sample collection, storage, and adherence to kit instructions are critical to minimizing these interferences and ensuring reliable data for maintaining optimal pool chemistry.

Calibrating Your Test Kit for Reliable Readings

Calibrating your pool test kit ensures accurate and reliable results. Always follow the manufacturer’s instructions for calibration, which may involve adjusting the kit or using reference standards. For digital testers, calibration is often automatic, while test strips require visual comparison. Proper calibration prevents false readings caused by expired reagents or worn components. Regularly check and replace reagents or strips as needed. Accurate calibration ensures your pool water chemistry is balanced, preventing unsafe conditions and equipment damage. Routine maintenance is key to maintaining reliable test results.

Troubleshooting Common Pool Testing Issues

Inconsistent results or unreliable readings can stem from expired reagents, improper sample collection, or contamination. Always follow instructions, use fresh reagents, and ensure samples are taken correctly.

Resolving Inconsistent or Unreliable Test Results

Inconsistent or unreliable test results often arise from expired reagents, contamination, or improper sample collection. Ensure reagents are fresh and stored correctly. Avoid touching test strips or adding excess water. Use clean, dry equipment and follow instructions precisely. If using digital testers, calibrate them as directed. Double-check water depth when sampling, typically 12-18 inches below the surface. For accurate readings, test strips should be compared to color charts within the recommended time frame. Repeat tests if results seem off, and consult the kit’s troubleshooting guide for specific issues.

Addressing Common Errors in Pool Water Testing

Common errors in pool water testing include using expired reagents, improper storage of test kits, and contamination during sampling. Always ensure reagents are within their expiration dates and stored in a cool, dry place. Avoid touching test strips with bare hands to prevent oil interference. When using liquid tests, follow the exact drop count and timing instructions. For digital testers, calibrate according to the manufacturer’s guidelines. If results seem off, retest with a fresh sample and verify the kit’s expiration dates. Proper handling and adherence to instructions minimize errors and ensure accurate readings.

Safety and Maintenance Tips for Pool Test Kits

Store pool test kits in a cool, dry place away from direct sunlight. Handle chemicals carefully, avoiding skin contact. Regularly clean and maintain your kit for accurate results.

Proper Storage and Handling of Test Kits

Store pool test kits in a cool, dry place away from direct sunlight and chemicals. Keep them out of reach of children and pets to avoid accidents. Always handle test strips, reagents, and equipment with clean, dry hands to prevent contamination. Avoid touching the test pads on strips, as oils from skin can affect accuracy. After use, clean any spillage immediately and ensure all components are tightly sealed. Regularly inspect the kit for expired or damaged items and replace them as needed to maintain reliability.

Maintaining Your Pool Test Kit for Longevity

Regularly clean and dry your pool test kit to prevent contamination and damage. Check expiration dates on reagents and test strips, replacing them as needed. Store the kit in a cool, dry place away from direct sunlight and chemicals. Avoid exposing components to extreme temperatures or moisture, which can degrade accuracy. Replace worn or damaged parts promptly to ensure reliable results. Follow the manufacturer’s guidelines for maintenance and recalibration to extend the life of your test kit and maintain its performance over time.

Regular pool testing ensures a safe, clean, and enjoyable swimming environment. By following proper kit instructions, you maintain balanced chemistry, prevent issues, and extend equipment life effectively.

Regular pool water testing is crucial for maintaining a safe and clean swimming environment. Use appropriate test kits, such as strips or digital testers, to accurately measure key parameters like chlorine, pH, and alkalinity. Proper sample collection and result interpretation are essential for making necessary chemical adjustments. Consistent testing prevents issues like algae growth and equipment damage. Follow test kit instructions and maintain equipment for reliable results and prolonged pool life. Adhering to these guidelines ensures a safe and enjoyable swimming experience.

taylor indoor outdoor thermometer manual

Welcome to the Taylor WeatherGuide System, an innovative solution for monitoring both indoor and outdoor temperatures with precision and ease. This all-in-one weather display allows users to track conditions from a single location, ensuring accurate readings and reliable performance. Designed for simplicity, the system includes a base unit and a remote sensor, making it ideal for home or office use. Reading the instruction manual is essential for optimal setup and operation, ensuring you get the most out of your thermometer’s features.

1.1 Overview of the Taylor WeatherGuide System

The Taylor WeatherGuide System is a reliable and user-friendly solution for monitoring indoor and outdoor temperatures. It consists of a base unit and a remote sensor, enabling seamless tracking of weather conditions from a single location. Designed for accuracy and simplicity, the system provides real-time updates, ensuring users stay informed about their environment. Its intuitive design makes it easy to set up and operate, offering a comprehensive weather monitoring experience for home or office use.

1.2 Key Features of the Thermometer

The Taylor Indoor/Outdoor Thermometer features wireless transmission for seamless indoor and outdoor temperature monitoring. It includes a wide temperature range, with indoor readings from 32°F to 122°F (0°C to 50°C) and outdoor readings from -40°F to 158°F (-40°C to 70°C). The device offers a clear LCD display, easy conversion between Fahrenheit and Celsius, and a clock function. Additional features include min/max temperature recall and a robust wireless signal range of up to 200 feet for reliable performance.

1.3 Importance of Reading the Instruction Manual

Reading the instruction manual is crucial for proper setup and operation of the Taylor Indoor/Outdoor Thermometer. It provides step-by-step guidance for installing batteries, placing the remote sensor, and understanding display readings. The manual also explains how to switch between Fahrenheit and Celsius, set the clock, and troubleshoot common issues. Following the manual ensures optimal performance, accurate temperature monitoring, and effective use of all features, maximizing your experience with the device.

Specifications of the Taylor Indoor/Outdoor Thermometer

The Taylor Indoor/Outdoor Thermometer features precise temperature monitoring with an indoor range of 32°F to 122°F (0°C to 50°C) and an outdoor range of -40°F to 158°F (-40°C to 70°C), ensuring accurate readings in various conditions. Its wireless transmission capability provides reliable data exchange between the base unit and remote sensor, making it a versatile tool for home or office use.

2.1 Indoor Temperature Range

The Taylor Indoor/Outdoor Thermometer measures indoor temperatures within a range of 32°F to 122°F (0°C to 50°C). This range ensures accurate monitoring in most residential and office environments; The base unit, placed indoors, provides precise readings for indoor conditions, while the remote sensor handles outdoor measurements. This wide range makes the thermometer suitable for various climates and settings, ensuring reliable performance year-round.

2.2 Outdoor Temperature Range

The Taylor Indoor/Outdoor Thermometer measures outdoor temperatures from -40°F to 158°F (-40°C to 70°C). This wide range ensures accurate monitoring in extreme weather conditions, from freezing winters to hot summers. The remote sensor, designed for outdoor use, transmits data to the base unit, allowing users to track temperature trends without exposure to the elements. This feature is essential for understanding outdoor climate variations and maintaining optimal indoor comfort year-round.

2.3 Wireless Transmission Range

The Taylor thermometer’s remote sensor transmits data to the base unit with a reliable wireless range of up to 200 feet. This extended range ensures uninterrupted communication, even in larger homes or outdoor settings. The signal strength is maintained through walls and other obstacles, providing consistent and accurate temperature updates. This feature enhances the system’s versatility, allowing users to place the sensor in optimal outdoor locations without compromising performance or data integrity.

Installation and Setup

Unpack and prepare the thermometer by installing batteries in both the base unit and remote sensor. Place the sensor outdoors for accurate readings, ensuring optimal placement for signal strength and weather exposure.

3.1 Unpacking and Preparing the Thermometer

Begin by carefully unpacking the Taylor Indoor/Outdoor Thermometer from its packaging. Ensure all components, including the base unit, remote sensor, and instruction manual, are included. Before proceeding, inspect the devices for any visible damage. Gently remove any protective covering from the screens and sensors. Familiarize yourself with the parts and their functions. Reading the instruction manual thoroughly is crucial for proper setup and operation. Prepare the units for installation by ensuring they are clean and dry.

3.2 Installing Batteries in the Base Unit and Remote Sensor

To power the Taylor Indoor/Outdoor Thermometer, install the required batteries in both the base unit and remote sensor. Open the battery compartment on the back or side of each device. Insert the recommended batteries (typically AAA for the remote sensor and AA for the base unit) ensuring the positive and negative terminals align correctly. Avoid mixing old and new batteries to maintain consistent power. Secure the compartment tightly after installation. If batteries are not included, purchase them separately before use.

3;3 Placing the Remote Sensor for Outdoor Use

Position the remote sensor in a sheltered outdoor location to ensure accurate temperature readings. Avoid direct sunlight, rain, or extreme weather conditions to prevent damage. Mount the sensor at least 3 feet off the ground for optimal airflow. The sensor can transmit data up to 200 feet to the base unit. Ensure it is placed within this range for reliable wireless communication. Secure the sensor firmly to prevent movement or tampering, ensuring consistent and precise outdoor temperature monitoring.

Understanding the Display

The display shows indoor and outdoor temperatures, time, and date, with large digits for easy readability. It provides clear, real-time updates for both locations, ensuring accurate monitoring and convenience.

4.1 Base Unit Readings

The base unit displays indoor temperature, time, and date. It receives outdoor data from the remote sensor, shown with large, easy-to-read digits. The base also indicates wireless signal strength, ensuring reliable connectivity. Use the buttons to toggle between Fahrenheit and Celsius or to review min/max records. The clear interface ensures quick access to all essential weather information from one convenient location.

4.2 Remote Sensor Readings

The remote sensor provides outdoor temperature readings, transmitted wirelessly to the base unit. It operates within a range of -40°F to 158°F (-40°C to 70°C), ensuring accurate outdoor monitoring. The sensor is battery-powered and should be placed in a shaded area for optimal performance. Its readings are essential for comparing indoor and outdoor conditions, offering a comprehensive view of your environment. Regular checks ensure reliable data transmission and accurate weather tracking.

4.3 Time and Date Display

The base unit features a clear time and date display, enhancing its functionality beyond temperature monitoring. The clock is easy to set using the SET button, ensuring accurate timekeeping. This feature allows users to track temperature changes in relation to time, providing valuable insights for daily planning. The date display adds convenience, making it a practical addition to the thermometer’s capabilities. Proper setup ensures seamless integration with temperature readings for a comprehensive monitoring experience.

Operating the Thermometer

Learn to operate your Taylor thermometer effortlessly. Switch between Fahrenheit and Celsius, set the clock, and review min/max temperature records. Clear instructions ensure optimal performance and accuracy.

5.1 Switching Between Fahrenheit and Celsius

To switch between Fahrenheit and Celsius on your Taylor thermometer, press and hold the SET button on the base unit for 3 seconds. Release the button when the temperature unit on the display begins to flash. Use the + or, button to select your preferred unit (°F or °C). The display will update automatically, confirming the change. This feature ensures versatility for users preferring different temperature scales.

5.2 Setting the Clock and Calendar

Press and hold the SET button for 3 seconds to enter Clock Setting Mode. Use the + or ౼ buttons to adjust the hour, then press SET to confirm. Repeat for minutes, AM/PM (if applicable), and date. The display will update with the new time and date. Ensure accuracy for proper temperature record-keeping. Exit by pressing SET again or waiting a few seconds. This feature ensures your thermometer stays synchronized with current time and date.

5.3 Reviewing Min/Max Temperature Records

Press and hold the MIN/MAX button to view the minimum and maximum temperature records; Use the + or — buttons to cycle between indoor and outdoor records. The display will show the highest and lowest temperatures recorded since the last reset. These records help track temperature trends over time. Note that min/max data is cleared when batteries are replaced or the unit is reset. Regularly reviewing these records ensures accurate temperature monitoring and historical tracking.

Maintenance and Troubleshooting

Press and hold the MIN/MAX button to view the minimum and maximum temperature records. Use the + or — buttons to cycle between indoor and outdoor records. The display will show the highest and lowest temperatures recorded since the last reset. These records help track temperature trends over time. Note that min/max data is cleared when batteries are replaced or the unit is reset. Regularly reviewing these records ensures accurate temperature monitoring and historical tracking.

6.1 Replacing Batteries

To maintain optimal performance, replace batteries in both the base unit and remote sensor when the low-battery icon appears. For the base unit, remove the compartment cover on the back, insert the required batteries, and close securely. The remote sensor typically uses 2 AAA batteries, accessible by sliding open the battery compartment. Replace batteries with high-quality ones to ensure reliable wireless transmission. Always turn off the device before replacing batteries to avoid signal interference or resetting issues. Dispose of old batteries properly to protect the environment.

6.2 Clearing Min/Max Temperature Records

To reset the min/max temperature records, press and hold the SET button on the back of the base unit for 3 seconds. Use the arrow buttons to navigate to the temperature reset option in the menu. Confirm the reset by pressing SET again. This will clear all stored minimum and maximum temperature data, allowing the device to start recording new values. Note that resetting will not affect the current temperature display or other settings; Ensure the device is turned off before resetting to avoid data corruption.

6.3 Resolving Wireless Signal Issues

If the wireless signal between the base unit and remote sensor is weak or lost, ensure the sensor is within the 200-foot transmission range. Remove any obstructions and verify that both units are powered on. If issues persist, reset the remote sensor by removing its batteries for 30 seconds, then reinsert them; Press and hold the SET button on the base unit to re-pair the devices. Ensure the signal icon appears stable for proper connection.

Additional Features

The Taylor WeatherGuide Thermometer includes a daily min/max temperature recall, a transmission signal icon, and large, easy-to-read digits for enhanced visibility, ensuring user-friendly monitoring of weather conditions.

7.1 Daily Min/Max Temperature Recall

The Taylor WeatherGuide Thermometer features a daily min/max temperature recall, allowing users to track the highest and lowest temperatures recorded in a 24-hour period. This function is accessible via the base unit, providing valuable insights into temperature fluctuations without manual logging. The feature is particularly useful for monitoring extreme weather conditions and ensuring accurate historical data for both indoor and outdoor environments;

7.2 Transmission Signal Icon

The Transmission Signal Icon on the Taylor WeatherGuide Thermometer indicates the strength and status of the wireless connection between the base unit and the remote sensor. A stable icon confirms a strong signal, while a flashing or absent icon may signal a weak connection. This feature helps users ensure reliable data transmission and verify sensor placement for optimal performance. It is essential for maintaining accurate and consistent temperature readings;

7.4 Large Digits for Enhanced Readability

The Taylor WeatherGuide Thermometer features large, easy-to-read digits, ensuring clear visibility of temperature data from any distance. This design enhances readability, making it convenient for users to quickly check indoor or outdoor temperatures without strain. The oversized display is particularly beneficial for individuals with visual impairments or for placement in areas where the thermometer is viewed from afar, ensuring a user-friendly experience in all settings.

The Taylor Indoor/Outdoor Thermometer is a reliable and user-friendly tool for monitoring temperatures. Regular maintenance ensures accuracy, and proper setup guarantees optimal performance for years to come.

8.1 Final Tips for Optimal Use

For optimal performance, replace batteries annually and ensure the remote sensor is placed in a shaded, sheltered area. Regularly check and clear min/max records to maintain accuracy. Use the transmission signal icon to verify connectivity and ensure the base unit is positioned away from direct sunlight or drafts. This will ensure reliable temperature readings and extend the product’s lifespan for consistent, accurate monitoring of indoor and outdoor conditions.

8.2 Importance of Regular Maintenance

Regular maintenance ensures the thermometer operates accurately and reliably. Replace batteries annually to prevent data loss and signal issues. Clean the remote sensor to avoid debris interference and ensure precise readings. Check wireless connectivity regularly and re-sync if necessary. Store the unit in a dry, cool place to prevent damage. Regular upkeep extends the product’s lifespan and guarantees consistent, accurate temperature monitoring for years to come.

arris tm1602 user manual

The ARRIS Touchstone TM1602 is a high-performance DOCSIS 3.0 telephony modem, delivering fast internet speeds and reliable Voice over IP service for home and small businesses.

1.1 Overview of the ARRIS Touchstone TM1602 Modem

The ARRIS Touchstone TM1602 is a DOCSIS 3.0-compliant telephony modem designed for high-speed internet and reliable voice services. It supports up to two lines of Voice over IP (VoIP) telephone service, making it ideal for homes and small businesses. The modem features an Ethernet connection for use with a single computer or a Local Area Network (LAN), ensuring versatile connectivity options. With its advanced technology, the TM1602 delivers fast and efficient internet speeds, enabling seamless streaming, downloading, and gaming experiences. It is also upgradeable, allowing users to stay ahead with emerging technologies. The modem is user-friendly and compatible with a wide range of cable services, making it a reliable choice for modern communication needs.

1.2 Key Features and Benefits

The ARRIS Touchstone TM1602 offers several key features that enhance its functionality and user experience. It supports DOCSIS 3.0 technology, ensuring faster internet speeds and improved performance for streaming and downloading. The modem provides two lines of Voice over IP (VoIP) service, delivering clear and reliable telephone communication. Its Ethernet connectivity allows for seamless integration with home or office networks, supporting both single devices and LAN setups. Additionally, the TM1602 is designed to be future-proof, with upgradeable capabilities to adapt to advancing technologies. These features make it an excellent choice for users seeking a modem that combines high-speed internet with advanced telephony services, ensuring reliability and efficiency for various needs.

Installation and Setup

Installing the ARRIS Touchstone TM1602 is straightforward, requiring connection of coaxial, power, and Ethernet cables. Setup is typically assisted by your cable provider for optimal configuration.

2.1 Getting Started with the TM1602 Modem

Getting started with the ARRIS Touchstone TM1602 modem involves a few simple steps. First, connect the coaxial cable to the modem and plug in the power cord. Next, use an Ethernet cable to link the modem to your computer or router. Ensure all connections are secure and the power light is on. Once powered up, the LED indicators will guide you through the initialization process. After successful boot-up, you can access the modem’s web interface to configure settings or check connectivity status. Refer to the user manual for detailed instructions on initializing and configuring the modem for your specific network setup.

2.2 System Requirements and Compatibility

The ARRIS Touchstone TM1602 modem is compatible with DOCSIS 3.0 networks and supports 24×8 channel bonding, ensuring high-speed internet performance. It works seamlessly with Windows, macOS, and Linux operating systems. The modem is designed for residential and small business use, supporting IPv4 and IPv6 protocols. It includes two Ethernet ports for wired connections and is compatible with most cable service providers. For optimal performance, ensure your computer or router meets the minimum requirements for your internet plan. The TM1602 is also backward compatible with DOCSIS 2.0, making it versatile for various network setups. Refer to the user manual for detailed specifications and compatibility guidelines to ensure proper installation and operation.

Advanced Configuration Options

The ARRIS Touchstone TM1602 offers advanced settings for customizing network performance, including QoS, port forwarding, and IP configuration, to optimize your internet experience.

3.1 Customizing Settings for Optimal Performance

Customizing settings on the ARRIS Touchstone TM1602 allows users to optimize performance for their specific needs. Key features include Quality of Service (QoS) settings to prioritize traffic for applications like streaming or gaming, port forwarding for enabling online gaming or remote access, and IP configuration options to manage connected devices. Users can also adjust advanced parameters such as MTU size and DNS settings for enhanced connectivity. Additionally, the modem supports upstream and downstream channel bonding, ensuring efficient data transmission. For advanced users, these settings can be accessed through the web-based interface, providing detailed control over network performance. Proper customization ensures a stable and high-speed internet connection tailored to individual requirements.

3.2 Managing Network and Security Features

The ARRIS Touchstone TM1602 offers robust network and security features to ensure a protected and reliable connection. The built-in firewall blocks unauthorized access, while VPN pass-through supports secure remote connections. MAC address filtering controls which devices can connect, adding an extra security layer. Encryption protocols safeguard data transmission, protecting sensitive information. These features, managed via the web interface, provide users with full control over network security. Enabling these settings helps protect the network from threats and ensures a secure browsing experience, making the TM1602 a dependable choice for both home and small business use.

Troubleshooting Common Issues

Identify connection problems by checking LED indicators or restarting the modem. Ensure cables are securely connected and verify internet service availability. Resetting the modem often resolves issues.

4.1 Diagnosing and Resolving Connection Problems

To diagnose connection issues with the ARRIS Touchstone TM1602, start by checking the LED indicators on the modem. A solid green power light indicates proper operation, while amber or red lights may signal a problem. Ensure all cables are securely connected and verify your internet service is active. If issues persist, restart the modem by unplugging it, waiting 30 seconds, and plugging it back in. This often resolves connectivity problems. If the issue remains, check for firmware updates or consult the user manual for detailed troubleshooting steps. Additionally, contact your cable provider to rule out service outages. For advanced diagnostics, access the modem’s web interface via its IP address (typically 192.168.0.1 or 192.168.100.1) using the admin credentials provided in the manual.

4.2 Resetting the Modem and Restoring Factory Settings

To reset the ARRIS Touchstone TM1602 to factory settings, locate the small reset button on the back of the modem. Using a pin or paperclip, press and hold the button for 10-15 seconds until the LED lights begin to flash. Release the button and allow the modem to restart, which may take a few minutes. This process will erase all custom settings, returning the modem to its original configuration. After the reset, log in to the web interface using the default admin credentials (found in the user manual) to reconfigure your settings. Note that resetting will not affect firmware updates but will clear any personalized preferences. Regular resets can help resolve persistent connectivity issues, but ensure you have your setup information handy before proceeding.

The ARRIS Touchstone TM1602 offers reliable performance for internet and voice services. For further detailed guidance, refer to the full user manual and contact ARRIS support for assistance.

5.1 Where to Find the Full ARRIS TM1602 User Manual

The full ARRIS Touchstone TM1602 user manual is available online for free download or viewing. It can be accessed through the official ARRIS website or trusted third-party sources. The manual is provided in PDF format, making it easy to download and print for reference. With 36 pages of detailed instructions, it covers installation, configuration, troubleshooting, and advanced features. The guide is written in English and has received high ratings for clarity and comprehensiveness. Users can search for the manual by visiting the ARRIS support page or using specific search queries like “ARRIS Touchstone TM1602 user manual PDF.” This resource ensures users can fully utilize their modem’s capabilities, including its DOCSIS 3.0 compatibility and Voice over IP functionality.

5.2 Contacting Manufacturer Support for Assistance

For further assistance with the ARRIS Touchstone TM1602, users can contact the manufacturer’s support team directly. The official ARRIS website provides a dedicated support section where customers can submit inquiries, access troubleshooting resources, and find contact information. Additionally, the website offers model-specific support pages, allowing users to quickly locate assistance tailored to the TM1602 modem. Customers can reach out via email, phone, or live chat for personalized help. The ARRIS support team is equipped to address a wide range of issues, from installation and configuration to advanced technical troubleshooting. By visiting the ARRIS website and navigating to the support page, users can ensure they receive accurate and timely assistance for their TM1602 modem.

sw10de manual

This manual provides essential guidance for the Suburban SW10DE water heater, ensuring proper installation, operation, and maintenance․ Designed for recreational vehicles, it emphasizes safety and efficiency․

Overview of the SW10DE Water Heater

The SW10DE is a reliable water heater designed for recreational vehicles, offering efficient performance and consistent hot water supply․ It operates on both electric and gas modes, ensuring versatility․ Key features include a compact design, user-friendly controls, and built-in safety mechanisms․ The module board, essential for operation, must be securely mounted during installation․ This model is popular for its durability and energy efficiency, making it a practical choice for RV owners seeking a dependable water heating solution․ The comprehensive guide ensures safe and optimal use․

Importance of Following the Manual

Adhering to the SW10DE manual is crucial for ensuring safety, efficiency, and longevity of the water heater․ Proper installation and operation prevent potential hazards and maintain warranty validity․ Failure to follow guidelines may result in malfunction or unsafe conditions․ The manual provides detailed steps for installation, maintenance, and troubleshooting, ensuring optimal performance․ Always refer to the manual before making adjustments or repairs to avoid voiding the warranty or causing damage․ Compliance with instructions guarantees reliable operation and enhances user safety, making it essential for all SW10DE users to follow the provided guidelines meticulously․

Installation Procedures

Installation of the SW10DE water heater requires careful adherence to the manual’s instructions to ensure safety and functionality․ Mount the module board securely, follow wiring guidelines, and ensure all connections are properly secured․ Always comply with local safety regulations and manufacturer recommendations to avoid hazards and maintain optimal performance; This section provides a comprehensive guide for a successful installation process․

Pre-Installation Checklist

Before installing the SW10DE water heater, ensure all electrical and gas connections are safely disconnected․ Shut off the power supply and allow the area to clear of any gas fumes․ Verify that the module board is securely mounted and comply with local safety regulations․ Check for proper ventilation and ensure all installation materials are available․ Follow the manual’s guidelines to prevent hazards and ensure a smooth installation process․ Proper preparation is key to a safe and efficient setup of your SW10DE water heater․

Step-by-Step Installation Guide

Mount the SW10DE water heater in a well-ventilated area, ensuring compliance with safety standards․ Connect the electrical supply, following the wiring diagram in the manual․ For gas models, attach the gas line securely and test for leaks․ Install the module board, ensuring it is permanently mounted․ Connect all sensors and components as outlined․ Turn on the power and test the system to ensure proper function․ Double-check all connections for tightness and safety․ Follow the manual’s instructions precisely to complete the installation successfully and safely․

Compliance with Safety Regulations

Ensure the SW10DE installation meets all local and national safety codes․ Proper ventilation is crucial to prevent gas accumulation․ Follow guidelines for electrical connections to avoid hazards․ For gas models, install the gas line correctly and test for leaks․ Adhere to manufacturer instructions for module board mounting and sensor connections․ Regularly inspect the system to maintain compliance and ensure safe operation․ Failure to comply may result in hazards or void the warranty․ Always prioritize safety when handling electrical and gas components․

Operating the SW10DE Water Heater

Ensure all electrical power is off before starting․ Wait five minutes for gas to clear if applicable․ Follow manual instructions for proper operation and settings․

Initial Start-Up Instructions

Before starting, ensure all electrical power is turned off and wait five minutes for any gas to clear the area․ Check all connections for tightness and ensure the DSI switch is in the OFF position․ Follow the manual’s specific start-up sequence to avoid issues․ Consult the manual for detailed steps, as improper initialization can lead to malfunctions․ Always refer to the provided instructions for safe and efficient operation․ This ensures optimal performance and longevity of the SW10DE water heater․

Daily Operation and Maintenance Tips

Ensure all electrical power is off before performing any maintenance․ Regularly inspect connections and components for wear or leaks․ Check the DSI switch to confirm it is in the OFF position when not in use․ Maintain proper water temperature settings to avoid overheating․ Clean the unit periodically to ensure optimal performance․ Refer to the manual for specific maintenance schedules and guidelines․ Always follow safety precautions to prevent accidents․ Proper daily care extends the lifespan and efficiency of the SW10DE water heater․

Energy-Saving Features and Settings

The SW10DE water heater includes energy-saving features such as adjustable temperature settings to optimize energy usage․ Use the eco-mode to reduce power consumption during low-demand periods․ Regularly inspect and maintain the unit to ensure efficient operation․ Proper installation and insulation of the water heater can also enhance energy savings․ Refer to the manual for specific settings and recommendations to minimize energy waste while ensuring reliable performance․ Proper use of these features helps lower energy bills and extends the appliance’s lifespan․

Troubleshooting Common Issues

Identify issues by checking power supply, gas leaks, or module board connections․ Reset the module board if necessary․ Refer to the manual for detailed diagnostic steps․

Identifying and Diagnosing Problems

Common issues include no power, gas leaks, or module board malfunctions․ Check the power supply, gas connections, and ensure the DSI switch is off․ Smell of gas requires immediate action;

Diagnose by verifying module board connections and ensuring proper ventilation․ If issues persist, reset the module board or check for faulty components․ Detailed troubleshooting steps are provided in the manual․

Resetting the Module Board

Resetting the module board on your SW10DE is a straightforward process; First, ensure all power to the water heater is turned off․ Allow the system to cool for at least five minutes․ Disconnect all wires from the module board, then wait an additional five minutes to ensure any residual power is discharged․ Reconnect the wires securely and restore power․ If issues persist, refer to the troubleshooting section or contact technical support for further assistance․

Addressing Gas-Related Concerns

If you detect a gas odor, immediately stop operation and follow the manual’s emergency procedures․ Turn off the manual gas valve and ensure proper ventilation․ Check all connections for leaks, and verify the module board is securely mounted․ If issues persist, disconnect power and contact a qualified technician․ Always adhere to safety guidelines to prevent hazards․ Regular maintenance and inspections are crucial for optimal performance and safety․

Warranty and Technical Support

Refer to the warranty section for detailed coverage and support options․ For assistance, contact the manufacturer or authorized service providers using the provided contact information․

Understanding the Warranty Terms

The warranty for the SW10DE water heater is provided by Suburban Manufacturing and typically covers parts and labor for a specified period, usually one to two years․ Proper installation and operation, as outlined in the manual, are prerequisites for warranty validity․ The warranty may exclude damages caused by improper installation, misuse, or failure to maintain the unit․ Specific terms and conditions, including what is covered and for how long, are detailed in the warranty section of the manual․ Always review the full warranty document for precise details and limitations․

Registering Your Product

Registering your SW10DE water heater is crucial for warranty validation and technical support․ Suburban Manufacturing requires product registration to ensure proper documentation and service eligibility․ To register, visit the official Suburban website or complete the registration form provided in the manual․ Provide essential details, including the product serial number, purchase date, and your contact information․ Retain the registration confirmation for your records․ This process ensures that you receive updates, support, and any potential recall notifications․ Suburban Manufacturing will securely handle your information and maintain it for future reference․

Contacting Customer Service

For any technical or warranty inquiries, contact Suburban Manufacturing customer service directly․ Visit their official website for the latest contact information․ Phone support is available during business hours, and email inquiries are typically responded to within 24-48 hours․ When reaching out, have your product serial number, purchase date, and a detailed description of your concern ready․ This ensures prompt and effective assistance․ Suburban Manufacturing is committed to providing reliable support to ensure your SW10DE water heater operates efficiently and safely․ Their team is available to address any questions or issues you may encounter․

This manual guides safe and efficient use of the SW10DE water heater, ensuring proper installation and maintenance․ Refer to it for future troubleshooting and updates․

Key Takeaways from the Manual

The SW10DE manual emphasizes proper installation, operation, and maintenance for optimal performance․ It highlights safety measures, troubleshooting tips, and energy-efficient settings․ Users should follow guidelines for compliance with regulations and ensure regular checks to prevent issues․ Understanding the module board’s role and gas safety is crucial․ The manual also stresses the importance of registering the product and utilizing customer support for assistance․ By adhering to these instructions, users can ensure reliable and efficient water heating while maintaining environmental and safety standards, particularly in recreational vehicle applications․

Future Reference and Updates

Retain this manual for future reference to ensure continued optimal performance of your SW10DE water heater․ Regularly check for updates or revisions to the manual, as new information or safety guidelines may be released․ For the latest troubleshooting tips, operational best practices, and compliance updates, visit the manufacturer’s official website or contact customer support․ Staying informed will help you maintain your unit’s efficiency and safety over time, ensuring reliable service in your recreational vehicle applications․

instruction manual for evenflo car seat

Welcome to the Evenflo Car Seat Instruction Manual. This guide ensures proper installation, safety, and optimal use of your car seat. Explore safety tips, installation steps, and troubleshooting solutions, with support from Evenflo’s FAQs and customer service for a secure and comfortable experience.

Understanding the Importance of Proper Installation

Proper installation of your Evenflo car seat is crucial for ensuring your child’s safety. Correct use minimizes injury risks and ensures the seat functions as designed. Always follow the instruction manual and vehicle guidelines for secure installation. Evenflo provides detailed steps to guide you through base installation, harness adjustment, and tether strap use. Incorrect installation can lead to safety hazards, so take the time to understand each step thoroughly. For further assistance, consult Evenflo’s FAQs or a certified Child Passenger Safety Technician (CPST) for guidance.

Overview of Evenflo Car Seat Models and Features

Evenflo offers a range of car seat models designed for safety and comfort, catering to newborns, toddlers, and big kids. Models like the NurtureMax and Grow With Me provide multi-mode use, transitioning from rear-facing to forward-facing and booster configurations. Features include adjustable harnesses, anti-rebound bars, and compatibility with strollers. Evenflo seats are built with durable materials and innovative safety technologies, ensuring proper fit and protection. They also offer easy installation options and storage solutions when not in use, making them versatile for growing families.

Safety Guidelines and Precautions

  • Always follow the manual and vehicle guidelines for proper installation and use.
  • Ensure the car seat is compatible with your vehicle and child’s weight/height.
  • Regularly inspect the seat for wear or damage.
  • Never modify or alter the car seat.
  • Keep the harness snug and chest clip correctly positioned.

Key Safety Features of Evenflo Car Seats

Evenflo car seats are designed with advanced safety features to protect your child in the event of a crash. The anti-rebound bar reduces rear-facing rebound motion, while energy-absorbing foam lining absorbs and distributes crash forces. Side impact protection shields your child from collision impacts, and the 5-point harness system ensures a secure fit. Additionally, the tether strap enhances stability, and the chest clip aligns with your child’s armpits for proper positioning. These features work together to minimize injury risk and ensure optimal safety.

Important Safety Considerations Before Installation

Before installing your Evenflo car seat, ensure your vehicle is compatible and consult its manual for specific instructions. Check the car seat’s expiration date and inspect for damage or wear. Always follow the weight and height limits specified in the manual. Avoid using inflatable seat belts, as they may not secure the seat properly. Ensure the car seat is not too large for your vehicle and that the base is tightly secured. Never alter or add aftermarket products to the seat, as this could compromise safety.

Step-by-Step Installation Instructions

Begin by reading your vehicle’s manual to locate suitable seating positions and understand seat belt locking mechanisms. Place the car seat base securely, ensuring it is tightly fastened using either the LATCH system or a locked seat belt. Tighten the base until it cannot move more than one inch side to side or front to back. Follow the manual’s specific guidance for rear-facing or forward-facing installations to ensure optimal safety and proper fit.

How to Install the Base of the Car Seat

To install the base, locate a suitable seating position in your vehicle, ensuring it is flat and level. Use the LATCH system or a seat belt to secure the base tightly. Position the base so it cannot move more than one inch in any direction. Tighten the base using the built-in tightening strap or seat belt until it feels firm and stable. Always refer to your vehicle’s manual for specific instructions on locking mechanisms and approved seating locations.

Securing the Car Seat and Adjusting the Harness

After installing the base, place the car seat into it until it clicks securely. Ensure the seat belt or LATCH system is tightly fastened, with no slack. For the harness, thread the straps through the correct slots to fit your child snugly, ensuring the chest clip is at armpit level. Tighten the harness until it feels firm against your child’s body. Always check for proper fit and consult the manual for specific adjustment instructions to ensure maximum safety and protection.

Installing the Tether Strap for Enhanced Safety

To install the tether strap, locate the tether anchor in your vehicle, as indicated in your vehicle’s owner’s manual. Route the tether strap from the back of the car seat to the anchor, ensuring it is not twisted. Secure the strap to the anchor and tighten firmly by pulling on the strap. Check for any slack and ensure the car seat moves less than one inch side to side. This step enhances stability and safety, especially in forward-facing installations, as recommended by Evenflo guidelines.

Using the Car Seat Correctly

Ensure proper fit by adjusting the harness snugly and positioning the headrest correctly. Regularly check for a secure fit and make adjustments as your child grows, following Evenflo’s guidelines for optimal safety and comfort.

Adjusting the Harness and Headrest for Proper Fit

Regularly adjust the harness and headrest to ensure proper fit as your child grows. Loosen the harness straps, position them at or below your child’s shoulders (rear-facing) or above (forward-facing), and tighten securely. The chest clip should sit at armpit level. Adjust the headrest to support the back of your child’s head, ensuring their ears are within the seat’s sides. Always check the fit after adjustments and refer to the manual for model-specific guidance. Proper fit enhances safety and comfort.

Converting the Car Seat from Rear-Facing to Forward-Facing

To convert your Evenflo car seat from rear-facing to forward-facing, first ensure your child meets the weight and height requirements outlined in the manual. Remove any padding or inserts not needed for forward-facing. Adjust the seat base and headrest to the appropriate position, ensuring the harness straps are above your child’s shoulders. Reinstall the seat following forward-facing installation instructions, using either the seat belt or LATCH system. Tighten the seat securely and check for proper alignment. Always verify stability and refer to the manual for model-specific guidance.

Troubleshooting Common Issues

Resolve common issues like seat belt locking mechanisms and expiration concerns by consulting the manual or contacting Evenflo support. Address questions about proper installation and safety features for optimal use.

Resolving Problems with Seat Belt Locking Mechanisms

If you encounter issues with seat belt locking mechanisms, consult your vehicle’s manual to determine how to lock the belt for child restraint installation. Ensure the seat belt is securely fastened and not twisted. If the mechanism fails to lock, try cleaning the buckle or checking for debris. If issues persist, contact Evenflo customer support for assistance or refer to their FAQs for troubleshooting guides. Proper function is critical for your child’s safety.

Addressing Common Questions About Expiration and Replacement

Evenflo car seats have an expiration date, typically 6-10 years from manufacture, due to material degradation. Check the date on the seat’s label or manual. Signs of expiration include cracks or worn parts. Expired seats should be replaced to ensure safety. Dispose of old seats properly, possibly through recycling programs. Replace seats after accidents, even if undamaged, as internal structures may be compromised. Contact Evenflo for replacement options and stay informed via their website or customer support for updates and recalls.

Maintenance and Care of the Car Seat

Regularly clean the car seat with mild soap and water, avoiding harsh chemicals. Store it in a cool, dry place when not in use. Inspect for wear or damage and replace as needed to ensure safety and durability.

Cleaning the Car Seat Safely

To clean your Evenflo car seat, use mild soap and warm water. Avoid harsh chemicals, bleach, or abrasive cleaners, as they may damage materials. Spot clean stains gently with a damp cloth, and allow the seat to air dry. For harness straps, hand wash with mild soap and rinse thoroughly. Never machine wash or dry the car seat, as this can compromise safety features. Regular cleaning ensures a hygienic and safe environment for your child;

Storing the Car Seat When Not in Use

When storing your Evenflo car seat, place it in a cool, dry location away from direct sunlight. Avoid basements or attics due to moisture or temperature extremes. Ensure the seat is clean and dry before storage to prevent mold or mildew. Do not store the car seat in the vehicle for extended periods. Proper storage helps maintain the seat’s integrity and ensures it remains safe for future use. Always follow the manufacturer’s guidelines for storage to preserve its quality and functionality.

Manufacturer Support and Resources

Evenflo provides comprehensive support through their official website, offering instruction manuals, FAQs, and customer service. Access troubleshooting guides, repair options, and expert assistance for your car seat needs.

Accessing Evenflo FAQs and Customer Support

Evenflo offers extensive support resources to assist with car seat installation, safety, and maintenance. Visit their official website to access a detailed FAQ section, troubleshooting guides, and repair options. Customers can also reach out to Evenflo’s customer service team for personalized assistance with installation, harnessing, or product inquiries. Additionally, the website provides links to instruction manuals and videos, ensuring you have all the tools needed to use your car seat confidently and safely.

Finding Instruction Manuals and Repair Options

Evenflo provides easy access to instruction manuals and repair options for their car seats. Visit their official website to download specific product manuals in PDF format. The site also offers a dedicated section for troubleshooting and repair guidance. For further assistance, contact Evenflo’s customer support team via phone or email. Their comprehensive resources ensure you can maintain and repair your car seat effectively, keeping your child safe and secure.

Thank you for following the Evenflo Car Seat Instruction Manual. Proper use ensures safety and ease, giving you peace of mind for your child’s travels.

Final Tips for Ensuring Your Child’s Safety

To ensure your child’s safety, always check the car seat’s expiration date and avoid using expired seats. Regularly inspect the seat for wear and tear, and never use it after an accident; Tighten the harness snugly, ensuring no slack, and always use the tether strap for added stability. Refer to the manual for weight and height limits, and consult a certified CPST if unsure. Stay informed about car seat regulations and updates to keep your child protected on every journey.

Staying Informed About Car Seat Regulations and Updates

Stay updated on car seat regulations by visiting the NHTSA website and Evenflo’s official resources. Register your car seat to receive safety updates and recall alerts. Attend local safety workshops or check with certified technicians for guidance on new guidelines. Always verify your state’s specific laws, as regulations vary. Regularly review Evenflo’s support page for the latest information and updates to ensure your car seat meets current safety standards and your child remains protected.