free standing patio cover plans pdf

Free-standing patio cover plans provide comprehensive designs for creating shaded outdoor spaces‚ offering various styles‚ materials‚ and construction tips to enhance your backyard while ensuring safety and durability.

1.1 What Are Patio Cover Plans?

Patio cover plans are detailed blueprints and guides designed to help homeowners and builders construct shaded outdoor structures. These plans typically include material lists‚ measurements‚ and step-by-step instructions for creating freestanding or attached covers. They often cater to various styles‚ such as gable‚ hip‚ or lean-to designs‚ and can be adapted to fit different spaces and preferences. The plans ensure safety‚ durability‚ and compliance with local building codes‚ making them essential for successful DIY projects.

1.2 Benefits of Free-Standing Patio Covers

Free-standing patio covers offer both aesthetic and functional benefits‚ enhancing outdoor living spaces with shade and protection from the elements. They provide versatile design options‚ allowing homeowners to customize styles and materials while preserving yard space. These structures can be tailored to complement existing architecture‚ creating a seamless transition between indoor and outdoor areas. Additionally‚ they offer flexibility in placement and design‚ making them ideal for various landscapes and preferences‚ while also increasing property value and enjoyment.

Design Considerations for Free-Standing Patio Covers

Design considerations involve aligning the cover with your home’s style‚ optimizing space‚ and choosing roof styles based on purpose‚ while ensuring compliance with local building codes and maintenance needs.

2.1 Choosing the Right Design Style

Choosing the right design style for your freestanding patio cover involves aligning it with your home’s architecture‚ whether modern or traditional. Consider space availability and purpose—will it be for shade‚ rain protection‚ or entertaining? Select a roof style‚ such as gable‚ hip‚ or flat‚ to match your needs. Materials and decorative elements should enhance both functionality and aesthetics‚ ensuring a seamless integration with your outdoor space and landscaping.

2.2 Space and Dimension Planning

Assess your patio area to determine the ideal size and shape of your freestanding cover. Consider furniture placement and movement space to ensure functionality. Choose dimensions that complement your yard without overwhelming it. Measure carefully to align with your home’s architecture and surroundings. Ensure the structure adheres to local building codes and regulations. Proper planning ensures a balanced and functional outdoor space that enhances your property’s appeal.

2.3 Purpose and Functionality

Free-standing patio covers serve as versatile outdoor structures‚ primarily offering shade and weather protection. Their functionality can be tailored to provide shelter from both sun and rain‚ creating an inviting space for relaxation or entertainment. The design should align with the intended use‚ ensuring adequate coverage and structural integrity. Additional features like lighting or seating can enhance usability‚ making the patio cover a functional extension of your home.

Material Selection for Patio Covers

Material selection for patio covers involves choosing between wood and metal‚ each offering unique aesthetics‚ durability‚ and maintenance requirements to suit different climates and design preferences.

3.1 Wood vs. Metal: Pros and Cons

Wood offers a classic‚ natural aesthetic‚ blending well with landscapes‚ but requires regular maintenance to prevent rot and insect damage. Metal provides superior durability‚ minimal upkeep‚ and modern styling‚ making it ideal for harsh climates. Wood may be more budget-friendly initially‚ while metal’s lower long-term maintenance costs can offset its higher upfront price. Climate and personal preference are key factors in selecting the perfect material.

3.2 Climate and Maintenance Considerations

Climate plays a critical role in material selection and maintenance for patio covers. Wood requires regular staining or sealing to withstand moisture and pests‚ making it less suitable for damp climates. Metal‚ however‚ is highly durable and resistant to harsh weather‚ ideal for rainy or windy areas. Maintenance needs vary‚ with wood demanding more upkeep and metal offering a low-maintenance solution. Local weather conditions should guide your material choice to ensure longevity.

Foundation and Footing Requirements

A stable foundation is crucial for freestanding patio covers‚ with footing depth and type depending on soil conditions and local building codes to ensure structural stability.

4.1 Soil Type and Local Building Codes

Soil type significantly influences footing requirements‚ with well-drained soil needing shallower footings and unstable soil requiring deeper‚ more robust foundations. Local building codes dictate specific footing depths and sizes‚ ensuring compliance with safety standards. Proper post-to-footing connections are essential for stability‚ especially in areas prone to frost heave or high winds. Always consult local regulations to determine the appropriate foundation design for your freestanding patio cover.

4.2 Footing Depth and Stability

Footing depth is critical for ensuring the stability and structural integrity of your freestanding patio cover. Deeper footings are required for larger or heavier structures‚ especially in areas with unstable soil or frost heave. Concrete footings or helical piers may be necessary for added stability. Always consult local building codes for specific depth requirements‚ as improper footing can lead to structural failure. Proper post anchoring ensures long-term stability and safety.

4.3 Post-to-Footing Connections

Secure post-to-footing connections are essential for the stability and longevity of your freestanding patio cover. Use high-quality anchors or brackets designed for your specific footing type and post material. Properly anchoring the posts ensures a stable and durable structure‚ preventing movement and potential damage over time. Always follow local building codes and manufacturer recommendations to guarantee a safe and reliable connection.

Frame Construction and Assembly

Precise measuring and cutting of lumber ensure square cuts for stability. Use strong screws or bolts for secure joints‚ and consider metal brackets for added reinforcement. Pre-drill holes to prevent splitting and maintain plumb and square throughout assembly. This ensures a sturdy and durable patio cover frame.

5.1 Measuring and Cutting Lumber

Accurate measuring and cutting of lumber are critical for a stable frame. Use a square to ensure precise cuts and avoid uneven joints. Pre-drill holes to prevent splitting‚ especially when working with pressure-treated wood. Double-check measurements before cutting to minimize waste and ensure all pieces fit together seamlessly. Proper cutting techniques guarantee a strong foundation for your patio cover‚ ensuring structural integrity and longevity.

5.2 Joining Methods and Reinforcement

Secure joints are essential for structural stability. Use strong screws or bolts instead of nails for added durability. Metal brackets at key points‚ like beam-to-post connections‚ enhance strength. Pre-drill holes to prevent wood splitting‚ especially with pressure-treated lumber. Proper reinforcement ensures the frame remains stable and withstands environmental stresses‚ guaranteeing a sturdy and long-lasting patio cover structure.

5.3 Ensuring Structural Integrity

Ensuring structural integrity involves regular checks to ensure the frame is square and plumb. Use a level and square throughout construction to maintain accuracy. Reinforce the frame with additional bracing‚ especially for larger structures or those exposed to high winds. Secure posts to footings and ensure beam-to-post connections are tight. Properly align and fasten all components to achieve a sturdy and durable patio cover that withstands environmental stresses and remains safe for years.

Roofing Options for Patio Covers

Explore popular roofing options like asphalt shingles‚ metal‚ polycarbonate‚ and corrugated metal. Each offers unique benefits in durability‚ weather resistance‚ and aesthetic appeal‚ ensuring lasting protection for your patio.

6.1 Popular Roofing Materials

Popular roofing materials for patio covers include asphalt shingles‚ metal‚ polycarbonate‚ and corrugated metal sheets. Asphalt shingles offer a classic look and affordability‚ while metal provides durability and modern aesthetics. Polycarbonate panels allow diffused sunlight‚ ideal for partial shade‚ and corrugated metal adds a rustic charm. Each material offers unique benefits‚ ensuring protection and style for your outdoor space.

6.2 Installation Methods and Considerations

Installation methods vary based on roofing material. Asphalt shingles require underlayment and proper nailing‚ while metal roofing needs specialized fasteners and sealing. Polycarbonate panels are secured with screws and sealant. Ensure proper ventilation to prevent moisture buildup. Follow manufacturer instructions for specific materials to guarantee safety and effectiveness. Always use appropriate tools and techniques for a secure‚ weather-tight installation.

Finishing Touches and Enhancements

Add lighting‚ gutters‚ and decorative elements to enhance functionality and aesthetics. Incorporate ceiling fans‚ screens‚ or plants for comfort and style‚ ensuring a polished outdoor space.

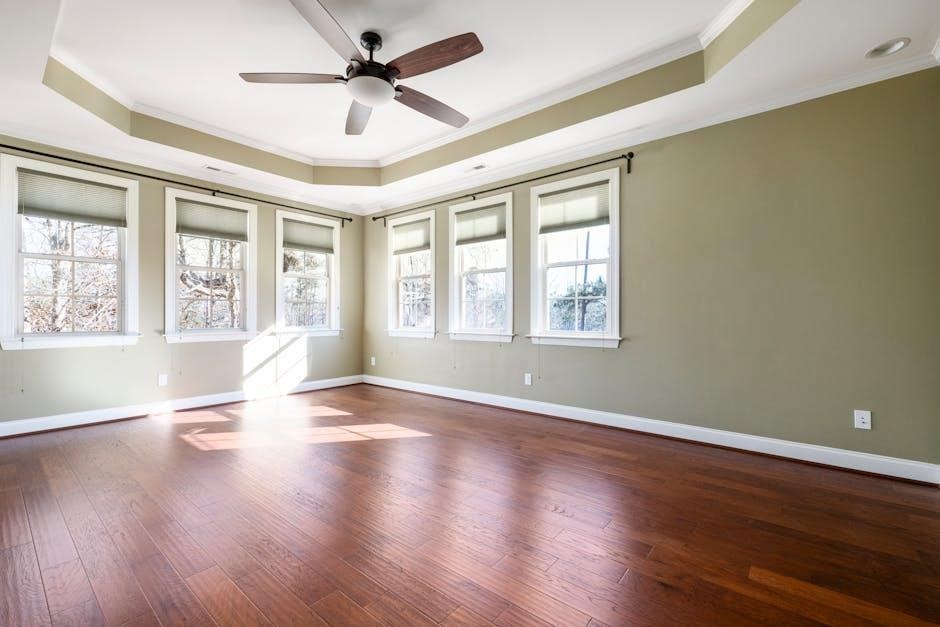
7.1 Lighting and Electrical Features

Enhance your patio cover with lighting and electrical features for ambiance and functionality. Install string lights‚ LED strips‚ or ceiling fans for a cozy atmosphere. Consider integrating retractable screens with electrical controls for shade and privacy. Ensure all installations comply with safety standards and local codes. These additions transform your patio into a welcoming outdoor retreat‚ perfect for evening gatherings and relaxation.

7.2 Gutters and Downspouts

Installing gutters and downspouts on your free-standing patio cover is essential for directing rainwater away from the structure‚ protecting the foundation from erosion and water damage. Choose durable materials like aluminum or vinyl for longevity. Ensure proper installation with sloped gutters and securely attached downspouts. Regular maintenance‚ such as cleaning leaves and debris‚ will extend the system’s lifespan and prevent clogs. This addition enhances both functionality and aesthetics.

7.3 Decorative Elements and Landscaping

Enhance your free-standing patio cover with decorative elements like latticework‚ trim‚ or climbing plants to integrate it seamlessly with your landscape. Incorporate lighting fixtures‚ such as string lights or LED strips‚ for ambiance. Adding plants or flower boxes around the structure can bring color and texture‚ creating a welcoming retreat. These touches transform a functional space into a stylish outdoor oasis‚ blending beauty with practicality.

Safety Compliance and Permits

Ensure your free-standing patio cover meets safety standards and local building codes. Obtain necessary permits to guarantee structural integrity and compliance with regulations.

8.1 Local Building Codes and Regulations

Local building codes and regulations vary by jurisdiction and dictate specific requirements for constructing free-standing patio covers. These codes consider factors like structure size‚ height‚ and materials to ensure safety and compliance. They often outline footing depth‚ post-to-beam connections‚ and load-bearing capacities. Consulting local authorities is essential to understand and adhere to these regulations‚ ensuring your patio cover meets legal and safety standards before construction begins.

8.2 Permit Requirements

Permits are often mandatory for constructing free-standing patio covers‚ especially if the structure exceeds a certain size or height. Requirements vary by location‚ but typically involve submitting detailed plans and adhering to local building codes. Ensure compliance by checking with local authorities before starting your project. Permit approval ensures safety standards are met and avoids potential legal issues during or after construction.

DIY Projects and Adaptation

Explore a variety of DIY projects‚ from simple to advanced designs‚ allowing you to customize free-standing patio cover plans to suit your space and preferences.

9.1 Simple and Budget-Friendly Designs

Simple and budget-friendly designs offer affordable solutions for creating free-standing patio covers. These plans often use pressure-treated lumber and corrugated metal‚ minimizing costs while providing essential shade and weather protection. DIY-friendly instructions make construction accessible for beginners‚ requiring basic tools and materials. Designs are adaptable‚ allowing customization to fit various spaces and preferences. Perfect for small patios‚ these plans ensure functionality without compromising on style or durability‚ making them ideal for homeowners on a budget.

9.2 Advanced and Customizable Plans

Advanced and customizable plans cater to experienced builders‚ offering intricate designs with curved rafters‚ latticework‚ or integrated lighting. These plans often specify high-grade materials like cedar or redwood for enhanced aesthetics and durability. They may include features like built-in seating or storage‚ requiring precise cuts and specialized tools. Detailed instructions guide complex joinery and load calculations‚ ensuring structural integrity. These projects allow for unique‚ tailored outdoor spaces that reflect personal style and craftsmanship.

Free-standing patio cover plans offer a comprehensive guide to designing and building stylish‚ functional outdoor spaces. With proper planning and adherence to safety standards‚ your project will thrive.

10.1 Summary of Key Considerations

When designing a free-standing patio cover‚ consider style‚ materials‚ and functionality. Choose wood for a classic look or metal for durability. Ensure a stable foundation adhering to local codes‚ and check permit requirements. Budget and maintenance needs should align with your lifestyle. Proper installation of roofing materials and structural reinforcement are crucial for safety and longevity. Adapting plans to your space and climate ensures a successful‚ enjoyable outdoor project.

10.2 Encouragement to Start Your Project

Embark on your free-standing patio cover project with confidence! With detailed plans and resources available‚ you can create a functional and stylish outdoor space. Whether you’re a DIY novice or an experienced builder‚ starting your project brings you closer to enjoying shade‚ comfort‚ and enhanced curb appeal. Take the first step today and transform your backyard into a welcoming retreat for years of enjoyment.

Additional Resources

Discover more free-standing patio cover plans and tutorials on websites like mycarpentry.com. Explore detailed guides‚ videos‚ and downloadable PDFs to aid your project and ensure success.

11.1 Recommended Websites for Plans

Explore websites like mycarpentry.com and DIYPatioPlans.com for free-standing patio cover plans. These sites offer detailed blueprints‚ step-by-step tutorials‚ and downloadable PDFs. They feature various designs‚ from modern lean-to styles to traditional gazebos. Additionally‚ OutdoorLivingDesigns.net provides customizable plans tailored to your space and preferences. These resources ensure you find the perfect design for your outdoor project‚ with practical advice and inspiration for every skill level.

11.2 Further Reading and Tutorials

For in-depth guidance‚ visit websites like mycarpentry.com and DIYPatioPlans.com‚ offering detailed tutorials and PDF guides. These resources provide step-by-step instructions‚ from foundation work to roofing. Additionally‚ platforms like YouTube and OutdoorLivingDesigns;net feature video tutorials and expert tips. These tools help both beginners and experienced builders refine their skills and complete projects successfully‚ ensuring professional-quality results for free-standing patio covers.

hampton bay ceiling fan instruction manual

Welcome to the Hampton Bay Ceiling Fan Instruction Manual․ This guide provides essential information for safe installation, operation, and maintenance of your ceiling fan․
Designed to help you maximize comfort and efficiency, the manual includes troubleshooting tips and warranty details․ Read carefully before installation to ensure optimal performance and safety․

1․1 Overview of the Manual

This manual is a comprehensive guide for Hampton Bay ceiling fan owners, covering installation, operation, maintenance, and troubleshooting․ It ensures safe and efficient use of your ceiling fan, with detailed instructions and safety precautions․ The manual also includes warranty information, energy-saving tips, and resources for additional support, helping you make the most of your ceiling fan․

1․2 Importance of Following the Instructions

Adhering to the manual’s instructions ensures safe and correct installation, operation, and maintenance of your Hampton Bay ceiling fan․ Properly following guidelines prevents hazards, optimizes performance, and prolongs lifespan․ Ignoring instructions may lead to safety risks, reduced efficiency, or voided warranty․ Always prioritize safety precautions and manufacturer recommendations for optimal functionality and energy efficiency․

Unpacking and Preparing Your Hampton Bay Ceiling Fan

Begin by carefully unpacking all components from the box․ Verify the contents match the manual’s list and identify key parts like blades, motor, and hardware․ Ensure all accessories are included and undamaged before proceeding with installation․

2․1 Checking the Contents of the Box

Upon unpacking, verify all components are included and undamaged․ Ensure the box contains fan blades, motor assembly, mounting hardware, downrod, and instruction manual․ Check for any missing or damaged items and compare against the packing list provided․ If any parts are missing or damaged, contact Hampton Bay customer support immediately before proceeding with installation․

2․2 Identifying Key Components and Accessories

Familiarize yourself with the fan’s components: fan blades, motor assembly, mounting hardware, downrod, and remote control or wall switch․ Check for additional accessories like light kits or decorative trim․ Ensure all parts are accounted for and properly labeled․ This step ensures you have everything needed for installation and operation, preventing delays or missing items․

Installing Your Hampton Bay Ceiling Fan

This section provides a comprehensive guide to installing your Hampton Bay ceiling fan, including safety precautions and step-by-step instructions for various ceiling types․ Always turn off power before starting and follow all provided guidelines for optimal performance and safety․

3․1 Safety Precautions Before Installation

Before installing your Hampton Bay ceiling fan, ensure the power is turned off at the circuit breaker․ Verify the fan is suitable for your ceiling type and location․ Avoid installing in areas exposed to water or extreme humidity․ Always use a sturdy mounting bracket and ensure it is securely fastened․ If no ceiling joist is present, install a hanger bar for added support․ For recalled models, inspect blades as per safety notices․

3․2 Step-by-Step Installation Guide

Begin by turning off the power at the circuit breaker․ Install the mounting bracket securely to the ceiling․ Attach the downrod to the fan motor and hang it from the bracket․ Secure the fan blades and light kit (if applicable)․ Connect the wiring according to the diagram in the manual․ Tighten all screws and test the fan․ For detailed visual instructions, visit Home Depot’s website and enter your fan’s model number․

3․3 Mounting Options (Standard, Flush, or Sloped Ceiling)

Choose from three mounting options: standard, flush, or sloped ceiling installation․ For standard ceilings, use the included downrod․ Flush mounting is ideal for low ceilings, attaching the fan directly to the bracket․ Sloped ceilings require an adapter (sold separately) to ensure proper installation․ Refer to the manual for specific hardware and instructions tailored to your ceiling type․ Ensure stability and safety by following the recommended mounting method․

Operating Your Hampton Bay Ceiling Fan

Operate your Hampton Bay Ceiling Fan using the remote control or wall switch․ Adjust speed settings for energy efficiency and air circulation․ Follow safety guidelines for safe operation․

4․1 Understanding Speed Settings and Reverse Function

Hampton Bay ceiling fans feature multiple speed settings to optimize air circulation and energy efficiency․ The reverse function allows you to change airflow direction for seasonal comfort․ Use lower speeds for circulation and higher speeds for cooling․ Ensure blades are secure and balanced before operating․ Regularly check for firmware updates if applicable․ Always follow manufacturer guidelines for smooth operation and safety․

4․2 Using the Remote Control or Wall Switch

Your Hampton Bay ceiling fan can be controlled using either the remote control or wall switch․ The remote allows adjustment of speed settings and reverse function․ Ensure batteries are installed correctly for proper remote operation․ The wall switch controls power and, if equipped, lighting․ Always check for proper installation and follow safety guidelines․ Regularly test controls to ensure smooth functionality and energy efficiency․

Troubleshooting Common Issues

This section helps resolve issues like wobbling, noise, or uneven airflow․ Check blade balance, tighten loose parts, and ensure proper installation․ Consult the manual for solutions․

5․1 Diagnosing Issues with Fan Operation

Identify issues by observing fan behavior․ Check for blade wobbling, unusual noises, or uneven airflow․ Ensure all screws are tightened and blades are balanced․ Consult the manual for specific diagnostics․ If blades detach during operation, stop use immediately and contact Hampton Bay support․ Verify if your model is part of any recall notices and follow repair instructions provided․

5․2 Resolving Common Problems (e․g․, Wobbling, Noise)

To fix wobbling, tighten all blade screws and ensure proper balance․ For noise, lubricate moving parts lightly․ If blades detach, stop use and contact Hampton Bay support․ Check for recalls and follow repair instructions․ Clean with a dry cloth, avoiding water or detergents․ Ensure all components are securely fastened and aligned for smooth operation․ Refer to the manual for specific troubleshooting steps․

Maintenance and Cleaning Tips

Regular cleaning with a dry cloth prevents dust buildup․ Avoid water or detergents․ Lubricate moving parts yearly and tighten screws to maintain stability and efficiency․

6․1 Recommended Cleaning Methods

Dust your Hampton Bay ceiling fan regularly using a dry, soft cloth to prevent dust buildup․ For more thorough cleaning, lightly dampen the cloth with water but avoid soaking․ Never use harsh chemicals or abrasive cleaners, as they may damage the finish․ Clean fan blades one at a time to maintain balance․ Recommended cleaning frequency is monthly during heavy use or quarterly otherwise․ Always turn off the power before cleaning․

6․2 Lubricating Moving Parts

Regular lubrication of moving parts ensures smooth operation and extends the lifespan of your Hampton Bay ceiling fan․ Apply a small amount of silicone-based lubricant to the motor and any moving components every 6-12 months․ Avoid using heavy oils or grease, as they may attract dust․ Over-lubrication can lead to residue buildup, so use sparingly․ Always turn off the power before performing maintenance․ Spot test lubricants on a small area first to ensure compatibility․

Safety Rules and Precautions

Always turn off power before servicing․ Avoid using water or damp cloths․ Keep children away from moving parts․ Do not operate near open flames or sparks․

7․1 General Safety Guidelines

Always disconnect power before installing or servicing the fan․ Ensure the ceiling can support the fan’s weight․ Avoid using water or damp cloths for cleaning․ Keep children and pets away from moving parts․ Never operate the fan near open flames or sparks․ Use only approved Hampton Bay replacement parts․ Ensure the fan is securely mounted to prevent wobbling or instability․ Follow all local electrical codes and regulations․ Regularly inspect the fan for damage or wear․

7․2 Electrical Safety Tips

Turn off the power at the circuit breaker before handling wires․ Verify all connections are secure and meet local codes․ Use a licensed electrician if unsure․ Avoid overloading circuits; ensure the fan is the only device on the circuit․ Never touch electrical components with wet hands․ Inspect wires for damage before installation․ Replace any damaged wires immediately․ Always follow the manufacturer’s wiring diagram for proper connections․ Keep all electrical parts out of reach of children․

Warranty and Customer Support

Your Hampton Bay ceiling fan is backed by a comprehensive warranty․ For inquiries or issues, contact customer support at 1-855-434-2678 or visit Home Depot’s official website․
Ensure to register your product for extended coverage and prompt assistance․ Refer to the manual for detailed warranty terms and support options․

8․1 Understanding Your Warranty Coverage

Your Hampton Bay ceiling fan is protected by a comprehensive warranty covering parts and labor for a specified period․
The warranty ensures defective components are repaired or replaced free of charge․ Register your product to activate extended coverage․
For details, refer to the manual or contact customer support at 1-855-434-2678․ Proper installation and maintenance are required to maintain warranty validity․

8․2 Contacting Hampton Bay Customer Service

For assistance, contact Hampton Bay Customer Service at 1-855-434-2678 or visit www․homedepot․com․
The support team is available to address questions, provide troubleshooting guidance, and help with warranty claims․ Reach out for expert help with your ceiling fan needs․

Energy Efficiency and Savings

Hampton Bay ceiling fans feature energy-saving designs, including reverse function for year-round comfort․ Optimize fan usage by adjusting speed settings according to seasonal needs to reduce energy consumption․

9․1 Energy-Saving Features of Hampton Bay Fans

Hampton Bay ceiling fans are designed with energy-saving features like reverse function for year-round comfort and optimized speed settings․ These fans reduce energy consumption by adjusting airflow according to seasonal needs․ Their efficient motor and blade design ensure maximum air circulation with minimal power usage, making them an eco-friendly choice for homeowners seeking to lower energy costs․

9․2 Optimizing Fan Usage for Energy Efficiency

To optimize energy efficiency, use the fan’s reverse function in winter to circulate warm air and reduce heating needs․ Run the fan at lower speeds during mild weather and higher speeds only when necessary․ Regularly cleaning blades ensures optimal airflow․ By adjusting fan settings seasonally and maintaining proper installation, you can maximize energy savings while enjoying consistent comfort throughout the year․

Recalls and Safety Notices

Check for recalls on your Hampton Bay ceiling fan model, as some units may have safety issues like detachable blades․ Visit Home Depot or manufacturer’s website for updates and instructions to ensure your fan’s safe operation and compliance with safety standards․

10․1 Checking for Recalls on Your Fan Model

To ensure your Hampton Bay ceiling fan is safe, visit the manufacturer’s website or Home Depot’s official page to check for recalls․ Enter your fan’s model number in the search bar to verify if it’s affected․ Review any recall notices carefully and follow the provided instructions to address the issue․ Contact Hampton Bay customer support if you need assistance or clarification․

10․2 Following Recall Instructions

Upon discovering a recall, immediately stop using your Hampton Bay ceiling fan․ Inspect the fan for any damage or loose parts․ Contact Hampton Bay customer support or visit their official website for specific recall instructions․ Follow the provided steps to obtain a repair kit or replacement․ Refer to the video guide on the King of Fans website for further assistance․ Ensure all safety measures are strictly followed․

Additional Resources

Access additional resources like downloadable manuals and online tutorials for installation and troubleshooting․ Visit Hampton Bay’s official website or Home Depot’s support page for more information and customer assistance․

11․1 Downloading the Latest Manual

To download the latest Hampton Bay ceiling fan manual, visit Home Depot’s official website․ Use the search bar with your fan’s model or item number to find the specific manual․ Click the download link to access the PDF․ Ensure you have the most current version for accurate installation, operation, and troubleshooting guidance․ Regular updates may include new features or safety information․

11․2 Accessing Online Tutorials and Videos

Visit Home Depot’s website to access online tutorials and videos for your Hampton Bay ceiling fan․ Enter your fan’s model or item number in the search bar, then click on the product page․ Look for the video link in the Product Overview section for step-by-step installation and troubleshooting guides․ These resources provide visual instructions to help you understand and resolve common issues effectively․ Videos are regularly updated to ensure accuracy․

12․1 Final Tips for Enjoying Your Hampton Bay Ceiling Fan

Regularly clean your fan blades to maintain airflow and aesthetics․ Adjust speed settings seasonally for optimal comfort․ Use the reverse function to circulate warm air in winter․ Ensure proper installation and balance to avoid wobbling․ Follow maintenance tips to extend lifespan․ Refer to the manual for troubleshooting common issues․ Enjoy energy savings and year-round comfort with your Hampton Bay ceiling fan!

list of prophets in the bible pdf

Biblical prophets were messengers of God‚ delivering divine messages to guide Israel and humanity․ Their teachings emphasize repentance‚ justice‚ and faith‚ shaping spiritual and moral foundations․ Resources like the Scofield Reference Bible and online PDF lists provide comprehensive studies of their roles and prophecies‚ offering insights into their significance and relevance today․

1․1 Overview of Prophets in the Bible

Biblical prophets‚ such as Elijah and Elisha‚ served as divine messengers‚ calling people to repentance and faith․ They addressed moral decay‚ foretold future events‚ and emphasized God’s covenant with Israel․ Prophets like Isaiah and Jeremiah delivered powerful messages of redemption and justice‚ while others‚ like Jonah‚ demonstrated God’s compassion beyond Israel․ Their teachings remain central to biblical theology and spiritual guidance․

1․2 Importance of Prophets in Biblical Context

Biblical prophets played a pivotal role in conveying God’s will‚ calling people to repentance‚ and upholding divine justice․ Their messages shaped Israel’s history‚ emphasizing covenant obligations and future redemption․ Prophets like Isaiah and Jeremiah provided spiritual guidance‚ while others‚ such as Elijah‚ demonstrated God’s power․ Their teachings remain foundational for understanding biblical theology and continue to inspire modern Christian faith and practice․

Categories of Prophets in the Bible

Biblical prophets are categorized into Major and Minor Prophets‚ differing in prominence and text length․ Major Prophets include Isaiah‚ Jeremiah‚ Ezekiel‚ and Daniel‚ while Minor Prophets include Hosea‚ Joel‚ Amos‚ Obadiah‚ Jonah‚ Micah‚ Nahum‚ Habakkuk‚ Zephaniah‚ Haggai‚ Zechariah‚ and Malachi‚ each conveying unique divine messages․

2․1 Major Prophets (Isaiah‚ Jeremiah‚ Ezekiel‚ Daniel)

The Major Prophets—Isaiah‚ Jeremiah‚ Ezekiel‚ and Daniel—are prominent due to their extensive writings and profound influence․ Isaiah foretold the Messiah’s coming‚ Jeremiah emphasized repentance‚ Ezekiel revealed divine judgment and hope‚ while Daniel provided apocalyptic visions․ Their teachings‚ found in PDF resources like the Scofield Reference Bible‚ offer deep spiritual insights‚ guiding believers in understanding God’s plan and redemption․

2․2 Minor Prophets (Hosea‚ Joel‚ Amos‚ Obadiah‚ Jonah‚ Micah‚ Nahum‚ Habakkuk‚ Zephaniah‚ Haggai‚ Zechariah‚ Malachi)

The Minor Prophets‚ despite their shorter writings‚ hold significant spiritual value․ Hosea emphasized God’s mercy‚ Jonah’s story illustrated redemption‚ and Malachi called for faithfulness․ Their teachings‚ accessible in PDF formats like the Scofield Reference Bible‚ provide practical lessons for modern believers‚ focusing on justice‚ compassion‚ and the anticipation of a messianic future․

Key Roles and Functions of Prophets

Prophets served as messengers of God‚ guiding Israel with divine messages‚ emphasizing justice‚ repentance‚ and faith․ Their teachings‚ found in resources like the Scofield Bible‚ remain vital today․

3․1 Spiritual Leadership and Guidance

Prophets provided spiritual leadership‚ guiding people to repentance and faith through divine messages․ Their teachings emphasized justice and morality‚ offering guidance for both individual and communal life․ Resources like the Scofield Reference Bible highlight their role in shaping Israel’s spiritual journey‚ ensuring their relevance for modern readers seeking moral and ethical direction․

3․2 Prophecies About the Messiah and Future Events

Biblical prophets foretold the coming of the Messiah and future events‚ offering hope and divine revelation․ Prophets like Isaiah foresaw Jesus’ mission‚ while others predicted events tied to Israel’s destiny․ These prophecies‚ detailed in resources like the Scofield Reference Bible‚ provide a roadmap of God’s plan‚ emphasizing redemption and the ultimate fulfillment of His promises to humanity․

Historical Context of Prophets

Prophets like Elijah and Elisha served as divine messengers‚ active during the 8th century BC‚ calling Israel to repentance and justice‚ shaping their historical and spiritual journey․

4․1 Prophets in the Old Testament Timeline

Prophets like Elijah and Elisha emerged during the 8th century BC‚ addressing spiritual decline and promoting justice․ Their ministries‚ alongside others‚ are chronicled in historical books‚ providing a timeline of divine intervention and guidance throughout Israel’s history‚ from the early monarchy to the Babylonian exile‚ shaping the nation’s spiritual journey and moral foundations․

4․2 Prophets and Their Impact on Israel’s History

Prophets played a pivotal role in shaping Israel’s history by confronting idolatry and injustice․ Elijah’s stand against Ahab and Jezebel exemplifies their courage․ The 8th-century prophets‚ such as Amos and Hosea‚ called for repentance‚ while others like Jeremiah guided Israel through the Babylonian exile․ Their teachings preserved faith‚ promoted justice‚ and influenced Israel’s spiritual and cultural identity‚ leaving a lasting legacy․

Modern Relevance of Biblical Prophets

Biblical prophets offer timeless lessons on justice‚ compassion‚ and faith․ Their teachings inspire contemporary spirituality‚ guiding believers in ethical living and fostering a deeper connection with God․

5․1 Lessons from Prophets for Contemporary Christianity

The prophets’ emphasis on justice‚ compassion‚ and faith provides timeless guidance for modern Christians․ Their teachings encourage believers to stand firm in moral values and trust God amidst challenges․ Elijah’s courage and Jonah’s obedience remind us of the importance of humility and following divine will‚ offering practical wisdom for today’s spiritual journeys and ethical decision-making․

5․2 Applying Prophetic Teachings in Daily Life

Prophetic teachings encourage believers to live with integrity‚ justice‚ and compassion․ By trusting God in difficult times‚ prioritizing moral integrity‚ and serving others‚ Christians can apply prophetic wisdom daily․ These principles foster a life of faith‚ humility‚ and obedience‚ helping believers navigate modern challenges while staying aligned with divine purpose and values․

Accessing Prophets’ Teachings in PDF Format

Biblical prophets’ teachings are accessible in PDF formats through religious websites‚ e-book platforms‚ and study guides․ These resources offer comprehensive studies‚ aiding deeper understanding and application of prophetic messages for personal and communal spiritual growth․

6․1 Where to Find Reliable PDF Resources

Reliable PDF resources on biblical prophets can be found on trusted religious websites‚ official denominational portals‚ and platforms like Google Books․ Websites offering extensive Bible study materials‚ such as the Scofield Reference Bible‚ often provide downloadable PDFs․ Additionally‚ online archives and libraries specializing in theological texts are excellent sources for accessing prophetic teachings in PDF format for deeper study and analysis․

6․2 Tips for Studying Prophetic Books in PDF

When studying prophetic books in PDF‚ start by prayerfully seeking understanding․ Use reference materials like commentaries or study guides for context․ Take notes on key verses and themes‚ and cross-reference with other Scriptures․ Utilize digital tools for highlighting and bookmarking․ Focus on applying teachings to daily life‚ ensuring a balance between historical context and modern relevance for a deeper connection with the prophetic message․

Resources for Further Study

Explore recommended commentaries and study guides for in-depth analysis․ Utilize online tools for examining prophetic texts and themes‚ enhancing your understanding of Biblical prophets and their messages․

7․1 Recommended Commentaries and Study Guides

For deeper insight‚ explore commentaries by renowned scholars and study guides that dissect prophetic texts․ The Scofield Reference Bible and modern resources like the Compendium of the Social Doctrine of the Church offer valuable perspectives․ Utilize these tools to enhance your understanding of Biblical prophets and their teachings‚ providing a richer context for your studies and reflections․

7․2 Online Tools for Analyzing Prophetic Texts

Utilize online tools like Bible study websites‚ concordances‚ and platforms offering interactive prophecy charts․ Resources such as BibleHub and MyBibleStudies provide verse-by-verse analysis and historical context․ These tools enhance understanding of prophetic symbolism and themes‚ making complex texts accessible for deeper study and reflection․ They are invaluable for exploring the depth of prophetic writings in a modern‚ digital format․

Common Misconceptions About Prophets

A common misconception is that prophets only predict the future or that all prophets held the same role․ Their diverse ministries often go unrecognized‚ leading to oversimplified views of their purpose and significance in biblical history․

8․1 Debunking Myths About Prophetic Ministries

Many believe prophets only predicted the future‚ but their roles were diverse‚ including teaching‚ guiding‚ and calling people to repentance․ Misconceptions also arise about their moral perfection‚ as some prophets faced personal struggles․ Additionally‚ the idea that all prophets held the same authority or function is incorrect‚ as their ministries varied widely in scope and purpose․

8․2 Understanding the Diversity of Prophetic Roles

Prophets in the Bible held diverse roles‚ from foretelling future events to guiding communities in moral and spiritual matters․ Some‚ like Elijah‚ performed miracles‚ while others focused on writing and teaching․ Their ministries varied‚ with some emphasizing social justice and others concentrating on messianic prophecies․ This diversity underscores their unique callings and contributions to Israel’s history and spiritual life․

Interpretation of Prophetic Writings

Prophetic writings often contain symbolism and metaphors requiring careful interpretation․ Understanding their historical and cultural context is essential for grasping their spiritual significance and relevance today․

9․1 Understanding Symbolism and Metaphors

Prophetic texts often employ symbolism and metaphors to convey divine messages․ For example‚ Ezekiel’s wheel or Revelation’s beasts symbolize spiritual truths․ Interpreting these requires understanding their cultural and historical contexts‚ ensuring deeper insights into their meanings‚ which are essential for modern readers seeking to apply these teachings in their lives effectively and accurately․

9․2 Contextualizing Prophecies for Modern Readers

Contextualizing prophecies involves bridging ancient texts with modern understanding․ By studying historical settings and cultural nuances‚ readers can apply timeless truths to contemporary life․ Resources like PDF commentaries and study guides help interpret symbolism and metaphorical language‚ making prophetic teachings relevant for addressing current spiritual‚ ethical‚ and societal challenges effectively․

Biblical prophets hold enduring significance‚ offering timeless teachings and guidance․ Their roles as messengers of God continue to inspire and inform modern spirituality and faith practices effectively․

10․1 Summary of Key Points

Biblical prophets served as God’s messengers‚ guiding Israel and humanity through divine revelations․ Their teachings emphasized repentance‚ justice‚ and faith‚ shaping moral and spiritual frameworks․ Resources like the Scofield Reference Bible and PDF lists detail their roles and prophecies‚ highlighting their enduring relevance in modern spirituality and faith practices․

10․2 Final Thoughts on the Significance of Prophets

Biblical prophets remain vital as divine messengers‚ offering timeless teachings on morality‚ justice‚ and faith․ Their insights guide believers in navigating life’s challenges‚ emphasizing God’s enduring presence․ Resources like PDF lists of prophets and study guides ensure their relevance‚ inspiring modern spirituality and fostering a deeper connection with sacred truths․

dewalt 1600 jump starter manual

Welcome to the DeWalt 1600 Jump Starter Manual, your comprehensive guide to understanding and operating the DXAELJ16 Lithium Automotive Jump Starter with USB Power Bank.

This manual provides essential information to ensure safe and effective use of the 1600A jump starter, including safety precautions, operational steps, and troubleshooting tips.

Designed to help you master the device, this guide covers key features, maintenance, and warranty details, ensuring you get the most out of your DeWalt 1600 Jump Starter.

Overview of the DeWalt 1600 Jump Starter

The DeWalt 1600 Jump Starter, model DXAELJ16, is a powerful and portable lithium automotive jump starter designed for emergency vehicle battery starts and charging devices.

  • Features 1600A peak amps for reliable starting power.
  • Includes dual USB ports (USB-A and USB-C) for charging electronic devices.
  • Compact and lightweight design for easy transport.
  • Built with high-quality lithium-ion technology for durability and performance.
  • Safe to use on cars, trucks, and other vehicles with 12V systems.
  • Equipped with an LCD display for clear status updates.
  • Includes a USB power bank function for added convenience.

Perfect for drivers seeking a reliable and versatile emergency power solution.

Importance of Reading the Manual

Reading the DeWalt 1600 Jump Starter manual is crucial for safe and effective use of the device. It provides detailed safety guidelines, operating instructions, and troubleshooting tips to ensure proper functionality. Understanding the device’s features and limitations helps prevent accidents and prolongs its lifespan. The manual also explains how to utilize the USB power bank function and maintain the unit. By following the instructions, users can avoid common mistakes and ensure optimal performance. Additionally, the manual outlines warranty conditions and manufacturer recommendations, making it an essential resource for owners. Always refer to the manual before first use to guarantee safe and efficient operation.

Safety Instructions and Precautions

Always ensure the work area is clean and well-lit to minimize accidents. Avoid operating the jump starter in explosive atmospheres or near flammable materials. Follow all safety guidelines in the manual to prevent injuries and device damage.

General Safety Guidelines

Always maintain a clean and well-lit workspace to reduce accident risks. Avoid operating the jump starter in explosive or flammable environments. Keep the device away from children and unauthorized users. Ensure proper ventilation when using the jump starter to prevent gas buildup. Never modify or tamper with the device, as this can lead to malfunction or injury. Store the jump starter in a cool, dry place, away from direct sunlight. Regularly inspect cables and connectors for damage before use. Follow all safety instructions provided in the manual to ensure safe and effective operation of the DeWalt 1600 Jump Starter.

Specific Safety Precautions for the DeWalt 1600 Jump Starter

When using the DeWalt 1600 Jump Starter, ensure the device is turned off before connecting or disconnecting cables. Avoid overcharging the battery to prevent damage or overheating. Never short-circuit the terminals, as this can cause serious injury or fire hazards. Always wear protective eyewear when jump-starting a vehicle. Keep the jump starter away from water or moisture to prevent electrical shock. Do not use the device near open flames or sparks. Regularly check the battery level and charge it only as needed. Follow the manufacturer’s guidelines for charging and storing the device to maintain its performance and safety.

Understanding the DeWalt 1600 Jump Starter

The DeWalt 1600 Jump Starter is a powerful, portable lithium device designed for jump-starting vehicles and charging electronics. It features 1600A peak current, USB-C, and USB-A ports for versatile charging.

Key Features and Specifications

The DeWalt 1600 Jump Starter boasts a 1600A peak current, ensuring reliable jump-starting for cars, trucks, and SUVs. It includes dual USB ports (3.1A) for charging devices and a built-in LED light for visibility in low-light conditions. The lithium-ion battery provides long-lasting power and quick recharging. Compact and portable, it’s designed for emergency situations. Advanced safety features prevent overcharging and short circuits. The device also supports 12V charging and includes durable clamps with ergonomic handles for easy use. Its rugged design ensures durability in various environments, making it a versatile tool for automotive emergencies and everyday power needs.

Components and Accessories

The DeWalt 1600 Jump Starter comes with essential components and accessories to ensure optimal performance. The kit includes heavy-duty clamps with ergonomic handles for secure battery connections, a USB-A and USB-C port for charging devices, and a built-in LED light for illumination in dark environments. Additional accessories include a carrying bag for easy transport and a user manual for detailed instructions. The starter also features a lithium-ion battery with a 12V charging port for convenient recharging. These components and accessories are designed to enhance portability, functionality, and user convenience, making the DeWalt 1600 a reliable roadside companion.

Operating the DeWalt 1600 Jump Starter

Operating the DeWalt 1600 Jump Starter involves following safety guidelines and step-by-step instructions for jump-starting vehicles and utilizing the USB power bank function effectively.

Ensure the device is fully charged, connect the clamps correctly to the battery terminals, and start the vehicle. The LED light assists in low-light conditions, and the USB ports charge devices on the go.

Refer to the manual for detailed operating procedures and troubleshooting tips to ensure safe and efficient use of the jump starter and its additional features.

Step-by-Step Jump Starting Process

Ensure the DeWalt 1600 Jump Starter is fully charged and free from damage. Locate the dead vehicle’s battery and wears protective gear.

Connect the positive (red) clamp to the positive terminal of the dead battery and the negative (black) clamp to a metal ground.

Turn on the jump starter and start the vehicle. Once started, remove the clamps in reverse order: negative first, then positive.

If the vehicle doesn’t start, check connections and ensure the jump starter is charged. Avoid short circuits and keep the area well-lit.

The LED light on the device assists in low-light conditions, ensuring safe and efficient jump-starting.

Using the USB Power Bank Function

The DeWalt 1600 Jump Starter features USB-A and USB-C ports for charging electronic devices like smartphones, tablets, and laptops. To use this function:

Connect your device using the original USB cable to either the USB-A or USB-C port.

The device will automatically begin charging. The USB-C port supports faster charging with 3.1A output.

Monitor the LED indicator for battery level status. Recharge the jump starter when necessary.

Always use the provided or compatible cables to ensure safe and efficient charging. This feature is ideal for emergencies or on-the-go power needs.

Maintenance and Troubleshooting

Regular maintenance ensures optimal performance. Clean terminals with a wire brush and avoid overcharging. Store in a cool, dry place, away from flammable materials.

If the jump starter doesn’t charge, check the power source and cable. For a dead battery, ensure connections are secure. LED issues may indicate a battery problem.

USB ports not working? Verify the jump starter is charged and try a different cable or port. Resetting may require pressing specific buttons, as detailed in the manual.

Regular Maintenance Tips

Regular maintenance is crucial to ensure the DeWalt 1600 Jump Starter operates efficiently. Clean the terminals with a wire brush to prevent corrosion and ensure proper connections.

Store the jump starter in a cool, dry place, away from flammable materials. Avoid overcharging, as it can reduce battery lifespan. Check battery levels every 3-6 months during storage.

Inspect the USB ports and cables for damage. Use the provided charger to avoid compatibility issues. Refer to the manual for specific charging guidelines.

Keep the LCD screen clean and free of debris. For optimal performance, charge the device fully before storing it for extended periods.

Common Issues and Solutions

If the jump starter fails to turn on, ensure the battery is fully charged. For connection issues, clean the terminals with a wire brush to remove corrosion. If the device overheats, allow it to cool before use. Slow charging may indicate a faulty cable; use the provided charger. If the USB ports malfunction, check for debris or damage. Reset the device by holding the power button for 10 seconds. For persistent issues, refer to the troubleshooting section or contact customer support. Regular maintenance and proper storage can prevent many of these common problems.

Warranty and Support Information

The DeWalt 1600 Jump Starter is backed by a limited warranty. For details, register your product on the official DeWalt website or contact customer support directly.

Warranty Details

The DeWalt 1600 Jump Starter is covered by a limited warranty, ensuring protection against defects in materials and workmanship. The warranty period typically starts from the date of purchase and may vary depending on the region. To activate the warranty, users must register their product on the official DeWalt website. Additionally, the warranty does not cover damages resulting from misuse, improper maintenance, or normal wear and tear. For specific terms and conditions, refer to the warranty section on the DeWalt official website or contact their customer support team.

Customer Support and Service Options

DeWalt offers comprehensive customer support for the 1600 Jump Starter, ensuring assistance is readily available. Users can access support through the official DeWalt website, where they can find FAQs, troubleshooting guides, and downloadable manuals. Additionally, customers can contact DeWalt’s support team via phone or email for personalized assistance. Service options include repair services at authorized centers and online chat support for quick inquiries. For convenience, the website also provides a parts lookup tool and warranty registration. DeWalt’s commitment to customer satisfaction ensures that users receive prompt and reliable help whenever needed.

free will sam harris pdf free

Sam Harris’s work challenges the concept of free will, arguing it is an illusion shaped by neuroscience and philosophy, with profound implications for morality and society.

Overview of the Book “Free Will”

In Free Will, Sam Harris presents a compelling case for the illusion of free will, drawing on neuroscience, philosophy, and psychology. He argues that our choices are the result of brain processes beyond conscious control, challenging the notion of moral responsibility. Harris contends that acknowledging this illusion fosters empathy and reduces unnecessary suffering. The book is concise yet profound, making complex ideas accessible to a broad audience. Harris’s central thesis is that free will is not required for morality or meaning, offering a fresh perspective on human behavior and societal structures. This work has sparked significant debate, becoming a landmark in contemporary discussions on free will.

The Core Thesis: Free Will as an Illusion

Sam Harris’s central argument in Free Will is that the concept of free will is an illusion. He asserts that our decisions and actions are the result of preceding brain processes, genetics, and environmental factors, rather than conscious choice. Harris maintains that modern neuroscience demonstrates that the brain often decides before we are consciously aware, undermining the idea of self-control. This perspective challenges traditional notions of moral responsibility, suggesting that blame and praise are misplaced. Harris emphasizes that recognizing the illusion of free will leads to greater empathy and a more compassionate society, aligning with his broader goal of ethical and social reform. His thesis has sparked widespread debate, reshaping discussions on human agency and morality.

The Scientific Basis of Harris’s Argument

Harris’s argument relies on neuroscience, asserting that brain activity precedes conscious decisions, indicating choices are biologically determined, not freely willed.

Neuroscience and the Brain’s Role in Decision-Making

Sam Harris’s argument against free will heavily relies on findings from neuroscience, which suggest that decisions are often made before conscious awareness. Studies, such as those by Benjamin Libet, demonstrate that brain activity indicative of decision-making occurs seconds before individuals feel they’ve made a choice. Harris contends that this indicates decisions are the result of neural processes, not conscious free will. He further argues that genetics, environment, and past experiences shape these processes, making choices predetermined. This perspective challenges traditional notions of moral responsibility, as it implies that individuals cannot be fully held accountable for actions they had no control over.

Studies on Determinism and Moral Responsibility

Sam Harris’s argument aligns with determinism, positing that human behavior is the inevitable result of prior causes, making free will an illusion. He cites studies showing that brain activity often dictates decisions before conscious awareness, undermining the idea of moral responsibility rooted in free will. Harris argues that if our choices are entirely determined by factors like genetics, environment, and past experiences, we cannot be held morally responsible in the traditional sense. This perspective shifts the focus from punishment to rehabilitation, emphasizing understanding over blame. By rejecting free will, Harris advocates for a more compassionate approach to morality, where individuals are seen as products of their circumstances rather than autonomous agents. This view challenges conventional legal and ethical frameworks, urging a reevaluation of justice and accountability.

Philosophical Implications of Free Will Being an Illusion

The illusion of free will challenges traditional morality, yet Harris argues it strengthens compassion and redefines justice without undermining societal structures.

Morality Without Free Will

Sam Harris challenges the traditional link between free will and morality, arguing that the illusion of free will does not diminish moral responsibility. Instead, he contends that morality can exist without free will, as ethical behavior is rooted in compassion, empathy, and understanding. Harris emphasizes that recognizing the determinism behind human actions fosters a more forgiving and equitable society. By acknowledging that choices are influenced by genetics, environment, and past experiences, morality shifts from punishment to rehabilitation and societal improvement. This perspective not only maintains moral accountability but also promotes a more ethical and humane approach to human behavior and societal structures.

Impact on Legal and Social Systems

Sam Harris’s argument that free will is an illusion has significant implications for legal and social systems. If human behavior is entirely determined by factors like genetics and environment, traditional notions of guilt and punishment may need reevaluation. Harris suggests that legal systems should focus more on rehabilitation rather than retribution, as individuals cannot be held morally responsible for choices they had no control over. This shift could lead to more compassionate criminal justice policies and a greater emphasis on addressing the root causes of harmful behavior. Such changes would align legal frameworks with scientific understanding, promoting a more just and equitable society. Ultimately, Harris’s views challenge society to rethink its approach to justice and accountability.

Accessing “Free Will” by Sam Harris in PDF Format

Sam Harris’s Free Will is readily available in PDF format, enabling readers to explore his compelling arguments on the illusion of free will conveniently online.

Availability of the Book in Digital Formats

Sam Harris’s Free Will is widely available in digital formats, including PDF and ePUB, making it accessible to readers worldwide. The book can be downloaded from various online platforms, ensuring convenience for those interested in exploring Harris’s arguments. Many websites offer free or paid versions, catering to different preferences and budgets. This accessibility allows readers to engage with Harris’s thought-provoking ideas on the illusion of free will and its implications for morality and society. The digital formats are compatible with e-readers and mobile devices, providing an easy way to delve into this significant philosophical discussion. This availability underscores the book’s relevance and reach in contemporary discourse.

Where to Find Free or Paid PDF Versions Online

Accessing Free Will by Sam Harris in digital formats is straightforward, with multiple online platforms offering both free and paid PDF versions. Popular e-book retailers like Amazon and Google Books provide paid downloads, ensuring high-quality formats. Additionally, websites such as PDF Drive and Project Gutenberg offer free PDFs, especially for older works in the public domain. Some platforms may require user registration or subscriptions for access. These options cater to a wide audience, making Harris’s insights on free will and morality easily attainable. Readers can choose the most convenient platform based on their preferences and budget.

Critical Analysis of Harris’s Position

Harris’s argument, while logically coherent, faces criticism for oversimplification. Critics argue his dismissal of free will neglects philosophical nuances and practical implications of moral agency.

Academic Responses to Harris’s Arguments

Academic responses to Harris’s arguments in Free Will have been diverse, with scholars debating his conclusions. Leslie Allan provides a detailed analysis, arguing that while Harris challenges traditional views, his hard determinism may oversimplify the complexities of human agency. Other philosophers critique Harris’s rejection of free will, suggesting it undermines moral responsibility and social justice frameworks. Despite criticism, Harris’s work has sparked significant academic discussion, particularly in neuroscience and ethics. His arguments have been praised for their clarity and accessibility, making the debate on free will more accessible to a broader audience. The academic community continues to engage with his ideas, exploring their implications for philosophy, law, and morality.

Public Reception and Debate

The public reception of Sam Harris’s arguments on free will has been both enthusiastic and contentious. His book Free Will has sparked lively debates across various platforms, with many praising his clear and provocative presentation. Harris’s assertion that free will is an illusion has resonated with some, particularly those interested in neuroscience and philosophy. However, others have criticized his views, arguing that dismissing free will undermines personal responsibility and moral accountability. The debate has extended beyond academic circles, engaging a broad audience and inspiring discussions on social media, podcasts, and public forums. Harris’s work has successfully bridged the gap between scholarly discourse and public interest, making the concept of free will accessible and debatable for all.

The Importance of Understanding Free Will

Understanding free will is crucial for addressing ethical dilemmas, legal responsibility, and personal accountability, shaping societal systems, influencing modern debates, and guiding human behavior significantly.

Why the Concept Matters in Modern Society

The concept of free will is integral to modern society, influencing legal systems, moral frameworks, and personal responsibility. It shapes how we view justice, punishment, and ethical decision-making. Understanding whether free will is real or illusory impacts societal structures, from criminal punishment to mental health approaches. Harris’s argument that free will is an illusion challenges traditional notions of blame and accountability, urging a shift toward compassion and rehabilitation. This debate is crucial for evolving societal norms and policies, emphasizing the need for empathy and scientific understanding in addressing human behavior and moral dilemmas effectively in contemporary times.

Harris’s Contribution to the Ongoing Discussion

Sam Harris significantly contributes to the free will debate by bridging neuroscience and philosophy, offering a compelling case for determinism. His work challenges traditional views, sparking widespread discussion and debate. By making complex ideas accessible, Harris has engaged both scholars and the general public, fostering a deeper understanding of the illusion of free will. His arguments emphasize the need for moral and legal systems to adapt, focusing on rehabilitation over punishment. Harris’s contribution lies in his ability to provoke critical thinking and encourage a shift toward a more compassionate society, informed by scientific insights into human behavior and decision-making processes. His influence continues to resonate in both academic and public discourse;

Sam Harris’s exploration of free will challenges traditional beliefs, offering a provocative perspective on morality, responsibility, and human behavior, while his work remains widely accessible in PDF formats.

Final Thoughts on Free Will and Its Implications

Sam Harris’s argument that free will is an illusion reshapes our understanding of moral responsibility and societal structures. By emphasizing neuroscience and determinism, he challenges traditional views, advocating for a more compassionate approach to human behavior. His work, accessible in PDF formats, encourages readers to rethink ethics and justice without the concept of free will. Harris’s ideas provoke critical discussions, urging us to consider the practical implications of determinism in legal and social systems. Ultimately, his insights call for a shift in how we perceive human agency and accountability, fostering a more nuanced dialogue on morality and personal responsibility.

Encouragement to Explore the Topic Further

Exploring Sam Harris’s perspectives on free will offers a fascinating journey into philosophy, neuroscience, and ethics. His arguments, now widely available in PDF formats, challenge readers to question their beliefs about human agency. Delving into his work encourages a deeper understanding of how science and philosophy intersect to shape our views on morality and responsibility. Engaging with Harris’s ideas, whether through his book or online discussions, invites readers to critically evaluate the concept of free will and its implications. This exploration not only enriches one’s knowledge but also fosters a more informed and empathetic approach to societal issues, making it a rewarding intellectual pursuit.

owners manual cancun

The Owners Manual Cancun is a trusted resource for timeshare owners‚ offering insights into rentals‚ sales‚ and exchanges. Now a digital platform‚ it provides up-to-date information on Cancun properties‚ travel guides‚ and resort updates‚ helping owners make informed decisions and connect with the community.

1.1 Overview of the Owners Manual Cancun

The Owners Manual Cancun is a trusted resource for timeshare owners‚ offering insights into rentals‚ sales‚ and exchanges. Transitioning from print to digital‚ it provides up-to-date information on properties‚ travel guides‚ and resort updates‚ aiding owners in informed decision-making and fostering community connections.

1.2 Evolution from Print to Digital Platform

Launched as a quarterly magazine‚ the Owners Manual Cancun transitioned to a dynamic digital platform‚ enhancing accessibility and user experience. This shift allows real-time updates on listings‚ news‚ and guides‚ ensuring timeshare owners stay informed and connected in the evolving vacation rental market.

1.3 Importance of the Manual for Cancun Property Owners

The Owners Manual Cancun is vital for property owners‚ offering essential tools for managing‚ renting‚ and selling timeshares. It provides up-to-date information‚ resources‚ and a platform for communication‚ helping owners maximize their investments and stay informed about local regulations‚ market trends‚ and community updates.

History and Profile of the Owners Manual Cancun

The Owners Manual Cancun originated as a quarterly print magazine over 30 years ago‚ transitioning into a digital platform. It focuses on timeshares‚ particularly Royal Resorts‚ serving as a communication hub for the Cancun resort community.

2.1 Background and Founding of the Owners Manual

The Owners Manual Cancun was established to bridge communication gaps among timeshare owners‚ initially focusing on Royal Resorts. Founded over three decades ago‚ it began as a print newsletter aimed at facilitating exchanges‚ rentals‚ and sales‚ evolving into a digital hub for Cancun property management and travel insights.

2.2 The Role of the Manual in the Cancun Resort Community

The Owners Manual Cancun serves as a central hub for the resort community‚ connecting owners and travelers. It provides essential resources for managing properties‚ including rental listings‚ travel guides‚ and exchange opportunities. By fostering communication and collaboration‚ it enhances the overall experience for stakeholders in Cancun’s vibrant vacation rental market.

2.3 Milestones in the Development of the Manual

Launched as a quarterly print magazine‚ the Owners Manual Cancun transitioned to a digital platform‚ enhancing accessibility. It expanded services to include rental listings‚ travel guides‚ and exchange opportunities. Over 32 years‚ it has evolved into a trusted digital resource‚ supporting property owners and travelers with up-to-date information on Cancun and Riviera Maya.

Benefits of Using the Owners Manual Cancun

The Owners Manual Cancun offers timeshare owners tools for managing‚ renting‚ and selling properties. It provides travel guides‚ up-to-date listings‚ and resources for exchanges‚ enhancing ownership experiences.

3.1 How the Manual Helps Timeshare Owners

The Owners Manual Cancun aids timeshare owners by listing properties for rent‚ sale‚ or exchange. It provides travel tips‚ resort updates‚ and a platform to connect with other owners‚ facilitating informed decisions and maximizing property value through efficient resource management and community engagement.

3.2 Resources for Renting‚ Selling‚ and Exchanging Properties

The Owners Manual Cancun offers comprehensive resources for renting‚ selling‚ and exchanging properties. It provides up-to-date listings‚ detailed guides‚ and a platform to connect buyers‚ sellers‚ and renters. The manual ensures a seamless experience‚ helping owners market their properties effectively and reach a targeted audience interested in Cancun and Riviera Maya.

3.3 Access to Up-to-Date Information on Cancun and Riviera Maya

The Owners Manual Cancun provides up-to-date information on Cancun and Riviera Maya‚ including travel tips‚ local events‚ and news. It offers insights into dining‚ activities‚ and accommodations‚ helping property owners and travelers stay informed about the latest developments and trends in the region.

Services and Features Offered by the Owners Manual

The Owners Manual Cancun offers rental and sales listings‚ exchange opportunities‚ and travel guides. It also provides advertising options for property owners to promote their properties effectively.

4.1 Rental and Sales Listings

The Owners Manual Cancun provides comprehensive rental and sales listings for timeshare properties. Owners can advertise their villas‚ suites‚ and lockoffs‚ reaching a targeted audience. The platform offers a cost-effective way to promote properties‚ ensuring maximum visibility and potential bookings or sales. Listings are regularly updated to reflect current availability and pricing.

4.2 Exchange Opportunities for Timeshare Owners

The Owners Manual Cancun facilitates timeshare exchanges‚ enabling owners to explore diverse destinations. This feature promotes flexibility‚ allowing owners to experience new locations without additional costs. The platform connects members‚ simplifying the exchange process and enhancing the value of their timeshare investments through shared opportunities and direct communication.

4.3 Travel Guides and Tips for Cancun

The Owners Manual Cancun provides detailed travel guides and tips‚ highlighting Cancun’s top activities‚ dining spots‚ and transportation options. It offers insider knowledge on exploring the city‚ ensuring travelers make the most of their visit with tailored recommendations for diverse interests and preferences.

Property Management and Ownership in Cancun

Managing properties in Cancun requires understanding local regulations and maintenance needs. The Manual offers insights into legal obligations and strategies to maximize rental income effectively.

5.1 Managing Your Property in Cancun

Effective property management in Cancun involves understanding local regulations‚ maintaining property condition‚ and optimizing rental income. The Owners Manual provides guidance on hiring staff‚ handling renovations‚ and ensuring compliance with legal requirements to help owners manage their properties efficiently and attract potential renters or buyers in the competitive Cancun market.

5.2 Legal Requirements for Property Owners

Property owners in Cancun must obtain a Holiday Home Permit for short-term rentals and comply with local regulations. Understanding tax obligations and ensuring property registration are essential. The Owners Manual provides detailed guidance on legal requirements to help owners operate legally and avoid penalties in Mexico’s evolving vacation rental market.

5.3 Maintaining Your Property for Optimal Rental Income

Regular maintenance ensures your property remains attractive and functional‚ boosting rental income. Address repairs promptly‚ upgrade amenities‚ and invest in quality furnishings. Services like CasaGo assist in managing and optimizing properties‚ helping owners achieve higher occupancy rates and profitability in Cancun’s competitive vacation rental market.

The Owners Manual Cancun and Royal Resorts

The Owners Manual Cancun collaborates closely with Royal Resorts‚ offering exclusive listings‚ updates‚ and support for owners. This partnership enhances the value of timeshare ownership in Cancun.

6.1 Royal Resorts and Their Role in Cancun

Royal Resorts are premier vacation properties in Cancun‚ offering luxury accommodations and exceptional amenities. As a cornerstone of the local tourism industry‚ they provide unforgettable experiences‚ making them a key focus for the Owners Manual Cancun‚ which specializes in supporting timeshare owners with rentals‚ sales‚ and exchanges within this prestigious brand.

6.2 How the Manual Supports Royal Resorts Owners

The Owners Manual provides Royal Resorts owners with exclusive listings‚ rental and sales support‚ and up-to-date market insights. It simplifies property management‚ offering a platform for advertising and connecting with potential renters or buyers‚ while also providing travel tips and updates specific to Royal Resorts in Cancun.

6.3 Exclusive Listings and Updates for Royal Resorts

The Owners Manual offers exclusive listings and updates tailored for Royal Resorts‚ including rental and sales opportunities. It provides detailed market trends‚ travel tips‚ and resort-specific news‚ ensuring owners stay informed and connected to the latest developments in Cancun’s premier properties.

Advertising in the Owners Manual Cancun

The Owners Manual offers property owners cost-effective advertising solutions to showcase villas‚ suites‚ and lockoffs. Reach a targeted audience of travelers and buyers‚ ensuring maximum visibility for your listings.

7.1 Opportunities for Property Owners to Advertise

The Owners Manual Cancun provides property owners with cost-effective advertising solutions. Owners can showcase their villas‚ suites‚ and lockoffs through the magazine and website‚ reaching a targeted audience of travelers and potential buyers. This platform ensures maximum visibility and engagement for rental and sales listings‚ helping owners achieve their goals efficiently.

7.2 Effective Ways to Promote Your Property

The Owners Manual Cancun offers effective promotion strategies for property owners. High-quality listings‚ travel guides‚ and interactive features help showcase properties. By leveraging the platform’s targeted audience‚ owners can enhance visibility‚ attract potential renters or buyers‚ and maximize their property’s exposure in the competitive Cancun real estate and vacation rental market.

7.3 Reaching a Targeted Audience Through the Manual

The Owners Manual Cancun connects advertisers with a targeted audience of timeshare owners‚ travelers‚ and investors. By leveraging its quarterly magazine and website‚ the platform ensures ads reach those actively seeking Cancun properties‚ enhancing engagement and conversion rates through a trusted and focused medium.

User Management and Community Engagement

The Owners Manual Cancun offers tools for managing user accounts and profiles‚ fostering a sense of community among property owners and travelers through interactive features and updates.

8.1 Managing User Accounts and Profiles

The Owners Manual Cancun provides a user-friendly platform for managing accounts and profiles‚ ensuring secure access and personalized experiences. Members can update their information‚ track interactions‚ and customize preferences‚ enhancing their engagement with the community and resources.

8.2 Community Features for Property Owners

The Owners Manual Cancun offers interactive community features‚ including forums‚ discussion boards‚ and special interest groups. These tools enable property owners to share experiences‚ ask questions‚ and collaborate on topics like property management‚ local regulations‚ and rental strategies‚ fostering a supportive and informed community.

8.3 Engaging with Other Owners and Travelers

The Owners Manual Cancun fosters engagement through forums‚ direct messaging‚ and shared resources. Owners and travelers can connect‚ share tips‚ and discuss experiences‚ creating a vibrant network. This interaction helps build relationships‚ resolve questions‚ and gain insights into Cancun’s rental market and travel opportunities‚ enhancing overall community involvement and knowledge sharing.

The Owners Manual Cancun and the Future

The Owners Manual Cancun is evolving with new interactive features‚ ensuring it remains a vital resource for property owners in the digital age‚ supporting their needs with innovative solutions.

9.1 Upcoming Features and Improvements

The Owners Manual Cancun plans to enhance its platform with advanced search filters‚ real-time market analytics‚ and improved user dashboards. These upgrades will streamline property management‚ offer better insights‚ and ensure a seamless experience for users‚ staying ahead in the competitive vacation rental market while maintaining its commitment to user satisfaction and innovation.

9.2 Expanding Services for Property Owners

The Owners Manual Cancun is expanding its services to include comprehensive property management solutions‚ enhanced legal assistance for owners‚ and new investment opportunities. These additions aim to provide owners with more tools to manage and grow their properties efficiently‚ ensuring better returns‚ peace of mind‚ and staying updated on market trends with dedicated support.

9.3 The Role of the Manual in the Evolving Vacation Rental Market

The Owners Manual Cancun plays a pivotal role in the evolving vacation rental market by adapting to digital trends and offering tailored solutions. It provides owners with real-time market insights‚ rental optimization tips‚ and community support‚ ensuring they stay competitive and informed in a rapidly changing industry while maintaining high standards of service and reliability.

The Owners Manual Cancun remains a trusted guide for property owners‚ offering essential insights‚ resources‚ and services to navigate the evolving vacation rental market effectively and efficiently.

10.1 Summary of the Owners Manual Cancun

The Owners Manual Cancun is a trusted 32-year resource‚ evolving from print to digital‚ aiding timeshare owners in rentals‚ sales‚ and exchanges. It provides travel guides‚ updates‚ and serves as a vital communication hub for the Cancun resort community‚ ensuring informed decisions and community engagement.

10.2 Final Thoughts on Its Value to Property Owners

The Owners Manual Cancun remains an indispensable tool for property owners‚ offering comprehensive resources for managing‚ renting‚ and selling timeshares. Its transition to a digital platform enhances accessibility‚ ensuring owners stay informed. It empowers owners to maximize their investments and connects them with a vibrant community‚ making it a vital asset for success.

About the Author

The author brings over 32 years of expertise in Cancun property ownership‚ specializing in Royal Resorts timeshares. Their extensive experience with the manual ensures authoritative guidance.

11.1 Expertise in Cancun Property Ownership

The author’s expertise spans decades‚ focusing on Cancun’s dynamic real estate market‚ particularly in timeshares and vacation rentals. With deep knowledge of local regulations and market trends‚ they provide invaluable insights into managing‚ renting‚ and selling properties‚ ensuring owners maximize their investments and navigate the legal landscape effectively.

11.2 Experience with the Owners Manual

The author has extensive experience with the Owners Manual Cancun‚ having contributed to its growth from a print magazine to a digital platform. With over 32 years of involvement‚ they have helped timeshare owners navigate rentals‚ sales‚ and exchanges‚ while providing expert insights into Cancun’s evolving vacation rental market and community needs.

Contact Information

Connect with the Owners Manual Cancun team through their official website or email for inquiries‚ feedback‚ or assistance with listings and services.

12.1 How to Reach the Owners Manual Team

The Owners Manual Cancun team can be reached through their official website or via email for inquiries‚ feedback‚ or assistance. They also provide a contact form and phone number for direct communication. The team is available Monday-Friday and responds promptly to all queries‚ ensuring support for listings‚ services‚ and general information.

12.2 Submitting Feedback or Queries

Feedback or queries can be submitted through the Owners Manual Cancun website via the contact form or by emailing the support team. The team is available to address concerns and provide assistance during business hours. Submissions are reviewed promptly to ensure timely responses and continuous improvement of services for property owners and users.

singer brilliance 6180 instruction manual

The Singer Brilliance 6180 is a versatile sewing machine with 100 built-in stitches, automatic needle threading, and a large LCD display for easy operation. Its manual provides detailed guidance on setup, maintenance, and troubleshooting, ensuring optimal performance for both beginners and experienced sewists.

Overview of the Singer Brilliance 6180 Model

The Singer Brilliance 6180 is a high-performance sewing machine designed for versatility and ease of use. It features 100 built-in stitches, including decorative, stretch, and heirloom options, along with an automatic needle threader and a large LCD display for easy stitch selection. With a sewing speed of 750 stitches per minute, it offers efficiency for both casual and advanced projects. Its user-friendly interface and robust construction make it ideal for sewists of all skill levels, ensuring precision and creativity in every stitch.

Importance of the Instruction Manual

The instruction manual for the Singer Brilliance 6180 is essential for understanding its features, setup, and operation. It provides detailed guidance on using the machine’s 100 built-in stitches, automatic needle threading, and one-step buttonhole feature. The manual also includes safety precautions, maintenance tips, and troubleshooting steps to resolve common issues. By following the manual, users can optimize the machine’s performance, ensure longevity, and make the most of their sewing experience, whether they’re beginners or experienced sewists.

Safety Precautions and Warnings

Always follow safety guidelines to avoid accidents. Inspect the power cord for damage, avoid sewing near water, and keep children away while operating the machine.

General Safety Guidelines

Always unplug the machine when not in use or before cleaning. Use only Singer-recommended attachments to prevent damage. Keep the sewing area clean and clear of flammable materials. Avoid sewing near water or in humid conditions. Never wear loose clothing or jewelry that could get caught. Ensure children are supervised and do not operate the machine. Follow these guidelines to ensure safe and efficient sewing experiences with your Singer Brilliance 6180.

Machine-Specific Safety Instructions

For the Singer Brilliance 6180, ensure the power cord is undamaged and avoid sewing near water. Never operate the machine if it has fallen or been exposed to moisture. Always use the correct presser foot for the fabric type to prevent accidents. Keep fingers away from moving parts and avoid sewing when fatigued. Follow these machine-specific guidelines to ensure safe and reliable operation of your Singer Brilliance 6180 sewing machine.

Setting Up Your Singer Brilliance 6180

Unboxing and connecting the Singer Brilliance 6180 involves carefully removing packaging, inserting the bobbin, and threading the machine. Power on and ensure all components are securely in place for safe operation.

Unboxing and Initial Setup

Unboxing the Singer Brilliance 6180 involves carefully removing packaging materials and inspecting for damage. Insert the bobbin case and thread the machine as outlined in the manual. Attach the presser foot and ensure the power cord is securely connected. Familiarize yourself with the control panel and stitch selection. Always follow the manual’s step-by-step guide for proper setup to ensure safe and efficient operation. Proper initial setup ensures optimal performance and longevity of the machine.

Connecting and Powering the Machine

Connect the Singer Brilliance 6180 to a grounded electrical outlet using the provided power cord. Ensure the outlet matches the machine’s voltage requirements. Avoid using extension cords to prevent power issues. Before turning on, check the cord for damage and ensure all parts are securely attached. Plug in the machine and press the power button. The LCD display will illuminate, indicating the machine is ready for use; Always follow the manual’s guidelines for safe and proper electrical connection.

Maintenance and Care

Regular cleaning and lubrication are essential. Check for worn parts and follow manual guidelines for maintenance to ensure optimal performance and longevity of your Singer Brilliance 6180.

Regular Maintenance Tasks

Regular maintenance is crucial for the Singer Brilliance 6180. Start by cleaning the machine’s interior, paying attention to the bobbin area and feed dogs. Use a soft brush to remove dust and debris. Lubricate moving parts as specified in the manual to ensure smooth operation. Check for worn or damaged parts and replace them promptly. Additionally, inspect the needle and presser foot for alignment and damage. Follow the manual’s guidelines for routine checks to maintain performance and extend the machine’s lifespan.

Cleaning and Lubrication Instructions

To maintain the Singer Brilliance 6180, turn off and unplug the machine before cleaning. Use a soft brush to remove dust and debris from the interior, focusing on the bobbin area and feed dogs. Lubricate the machine’s moving parts with Singer-approved oil, applying a few drops as directed in the manual. Avoid over-lubrication to prevent damage. Clean the exterior with a damp cloth, ensuring no moisture enters the machine. Regular cleaning and lubrication ensure smooth operation and extend the machine’s lifespan.

Basic Sewing Operations

The Singer Brilliance 6180 offers essential sewing functions, including thread setup, tension adjustment, and fabric handling. Its 100 built-in stitches and one-step buttonhole feature ensure efficient and precise sewing.

Thread Setup and Tension Adjustment

The Singer Brilliance 6180 instruction manual provides clear guidance on thread setup and tension adjustment. Start by threading the machine according to the manual’s step-by-step instructions, ensuring the thread passes through the correct guides. Use the automatic needle threader for convenience. Proper tension adjustment is crucial for even stitching; refer to the manual for specific settings. Adjusting the tension discs and bobbin case correctly prevents issues like puckering or uneven stitches. Regular checks and adjustments ensure optimal sewing performance and prevent machine damage.

Fabric Handling and Stitch Selection

Fabric Handling and Stitch Selection

The Singer Brilliance 6180 instruction manual offers detailed guidance on fabric handling and stitch selection. Choose from 100 built-in stitches, including straight, zigzag, and decorative options. Use the LCD display to select stitches and adjust settings. For optimal results, match fabric type with appropriate stitches and presser feet. Lightweight fabrics may require a walking foot, while heavy fabrics benefit from a Teflon foot. Adjust stitch length and width as needed for precise control over your sewing projects.

Advanced Features of the Singer Brilliance 6180

The Singer Brilliance 6180 offers 100 built-in stitches, automatic needle threading, and one-step buttonhole creation. Its LCD display allows stitch customization, while decorative and utility stitches enhance versatility for various sewing projects.

Stitch Customization and Special Functions

The Singer Brilliance 6180 offers 100 built-in stitches, including decorative, utility, and heirloom options. Users can adjust stitch width and length for customization. The machine features a mirror imaging function, allowing stitches to be sewn in reverse for symmetry. Additionally, the one-step buttonhole function creates perfect buttonholes effortlessly. The automatic stitch locking ensures secure seams, while the LCD display provides clear stitch selection and customization options, making it easy to tailor projects to individual preferences.

Buttonhole and Decorative Stitch Options

The Singer Brilliance 6180 includes a variety of decorative stitches and a one-step buttonhole feature, perfect for enhancing your sewing projects. With multiple decorative stitch options, you can add intricate designs to fabrics. The one-step buttonhole function simplifies creating consistent buttonholes, saving time and effort. Stitch selection is made easy via the LCD display, allowing you to choose the ideal stitch for your project. This feature-rich machine offers versatility for both functional and creative sewing tasks, ensuring professional-quality results every time.

Troubleshooting Common Issues

The Singer Brilliance 6180 manual helps identify and resolve machine errors, such as error messages or malfunctioning parts. It guides users through resetting the machine and addressing common issues effectively.

Identifying and Resolving Machine Errors

The Singer Brilliance 6180 manual provides clear guidance for identifying and resolving common machine errors. It outlines steps to address issues like error codes, jammed fabrics, or improper stitching. Users can troubleshoot problems such as incorrect threading, needle breakage, or uneven tension. The manual also explains how to reset the machine and perform software updates to restore functionality. Regular maintenance, like cleaning and lubricating, helps prevent errors and ensures smooth operation.

Resetting the Machine and Software Updates

Resetting the Machine and Software Updates

The Singer Brilliance 6180 manual includes detailed steps for resetting the machine to its default settings, which can resolve operational issues. Users are guided through the process of resetting via specific button combinations or menu options. Additionally, the manual explains how to check for and install software updates to ensure the machine runs with the latest features and improvements. Regular updates and resets help maintain optimal performance and address any software-related glitches effectively.

Accessories and Attachments

The Singer Brilliance 6180 supports a range of compatible presser feet and accessories, enhancing sewing capabilities. Optional attachments expand functionality for specialized tasks, ensuring versatility in projects.

Compatible Presser Feet and Accessories

The Singer Brilliance 6180 is compatible with a variety of presser feet, including zipper, buttonhole, and blind hem feet, designed to enhance sewing precision and versatility. Additional accessories like extension tables and specialized needles expand its capabilities, allowing for intricate stitching and heavy-duty projects. The manual provides guidance on selecting and attaching these accessories, ensuring optimal performance for diverse sewing tasks and projects.

Using Optional Attachments for Expanded Capability

The Singer Brilliance 6180 supports optional attachments to enhance its functionality. These include specialized presser feet for tasks like quilting, embroidery, or heavy-duty sewing, as well as extension tables for larger projects. The manual provides step-by-step guidance on installing and utilizing these attachments, ensuring users can maximize their machine’s potential. Optional accessories like walking feet or rufflers can also be integrated, offering greater versatility for complex fabrics and decorative stitching.

Where to Download the Singer Brilliance 6180 Manual

Download the Singer Brilliance 6180 manual from Singer’s official website or third-party sites like ManualsLib. Ensure you source from trusted platforms for authenticity and safety.

Official Singer Website and Resources

The official Singer website is the primary source for downloading the Singer Brilliance 6180 manual. It offers free PDF downloads of instruction manuals, user guides, and service manuals for various Singer models, including the Brilliance 6180. The website ensures authenticity and safety, providing comprehensive resources to guide users through setup, maintenance, and troubleshooting. Additionally, Singer’s official resources include detailed user guides and instructional materials to enhance your sewing experience with the Brilliance 6180.

Third-Party Manual Download Options

Besides the official Singer website, third-party platforms like ManualsLib, ManualsOnline, and others offer free PDF downloads of the Singer Brilliance 6180 manual. These sites provide easy access to user manuals, service manuals, and instruction guides, ensuring you can find the necessary resources even if the official site is unavailable. They cater to a wide range of Singer models, making them a reliable alternative for users seeking comprehensive guides and troubleshooting tips for their Singer Brilliance 6180 sewing machine.

Additional Resources and Support

Explore online communities, forums, and video tutorials for Singer Brilliance 6180 tips and troubleshooting. Websites like ManualsLib and DNS-shop.ru offer guides, while Singer’s official site provides dedicated support.

Online Communities and Forums

Active online communities and forums, such as Singer’s official forums, Reddit, and Facebook groups, provide valuable support for Singer Brilliance 6180 users. These platforms offer troubleshooting tips, advice from experienced sewists, and creative project ideas. Users can share experiences, ask questions, and access video tutorials and downloadable resources, fostering a collaborative environment for maximizing sewing machine potential.

Video Tutorials and Instructional Guides

Video tutorials and instructional guides for the Singer Brilliance 6180 provide step-by-step visual guidance, covering setup, maintenance, and advanced features. Available on Singer’s official website and third-party platforms like YouTube, these resources help users master techniques such as threading, stitch customization, and troubleshooting. They also offer tips for optimizing machine performance and exploring creative sewing projects, making them invaluable for both beginners and experienced sewists looking to enhance their skills.

The Singer Brilliance 6180 sewing machine offers exceptional versatility and ease of use, supported by comprehensive resources. By following the manual and exploring tutorials, sewists can unlock its full potential, ensuring creative and professional results in every project.

Final Tips for Maximizing Your Sewing Experience

To maximize your sewing experience with the Singer Brilliance 6180, regularly maintain the machine, use recommended accessories, and explore all stitch options. Keep the machine clean, lubricate as needed, and stay updated with software. Practice on scrap fabric before sewing final projects and refer to the manual for troubleshooting. Engage with online communities and tutorials for inspiration and tips. By following these guidelines, you can unlock the full potential of your Singer Brilliance 6180 and achieve professional results.