danby mini refrigerator manual
Danby offers diverse mini refrigerators‚ from 4.2 to 7.4 cu. ft.‚ featuring models with freezers‚ mirrored doors‚ and digital controls.
What is a Danby Mini Refrigerator?
Danby mini refrigerators are compact cooling appliances designed for supplemental refrigeration‚ ideal for dorms‚ offices‚ or recreation rooms. They range in size‚ offering capacities from approximately 4.2 to 7.4 cubic feet. Many models feature both a refrigerator and a freezer compartment‚ though all-refrigerator options are also available.
Distinctive features include black stainless steel finishes‚ mirrored doors with integrated lighting‚ and digital temperature controls‚ enhancing both functionality and aesthetic appeal. Danby prioritizes energy efficiency‚ with many models earning ENERGY STAR certification.
Popular Danby Mini Refrigerator Models
Danby’s 4.7 cu. ft. dual-door models‚ like the DCR047A1BBSL‚ are popular for their combined fridge and freezer capacity and stylish black stainless steel finish. The DBMR02624WD43‚ a 7.4L mini fridge‚ stands out with its integrated mirror and LED lighting.
The DCRD042C1BSSDB‚ a 4.2 cu. ft. top-mount fridge‚ is favored for smaller spaces‚ while the DAR044A4BDD‚ a 4.4 cu. ft. all-refrigerator‚ appeals with its designer aesthetic and ENERGY STAR rating.

Understanding Your Danby Mini Refrigerator Manual
Danby manuals detail setup‚ operation‚ maintenance‚ and troubleshooting for each model‚ ensuring optimal performance and longevity of your compact refrigerator.
Locating the Manual
Danby mini refrigerator manuals are readily accessible through several convenient avenues. Initially‚ check within the packaging of your new appliance; a physical copy is often included. If you’ve misplaced it‚ Danby’s official website (Danby.com) hosts a comprehensive archive of downloadable manuals‚ searchable by model number.
Retailers like Lowe’s and Amazon may also provide digital versions on their product pages. Knowing your specific model number – typically found on a sticker inside the refrigerator – is crucial for locating the correct manual.
Manual Contents Overview
Danby mini refrigerator manuals comprehensively cover essential aspects of operation and maintenance. Expect detailed sections on safety precautions‚ installation guidelines – including proper ventilation – and temperature control settings. The manual outlines usage instructions for both the refrigerator and freezer compartments‚ alongside guidance on shelf adjustment and door operation.
Troubleshooting tips for common issues like cooling problems or excessive noise are also included‚ as well as warranty information and contact details for Danby support.

Setting Up Your Danby Mini Refrigerator
Danby manuals emphasize careful unpacking‚ inspection for damage‚ strategic placement ensuring adequate ventilation‚ and proper temperature control setup for optimal performance.
Unpacking and Inspection
Upon delivery‚ thoroughly inspect the Danby mini refrigerator for any visible signs of shipping damage before accepting it. Carefully remove all packaging materials‚ including tape‚ cardboard‚ and protective foam. Verify that all components are present‚ referencing the parts list within your Danby manual.
Check for dents‚ scratches‚ or other cosmetic imperfections. If damage is detected‚ immediately document it with photographs and contact the retailer or Danby customer support to initiate a claim. Retain all packaging until the inspection is complete.
Placement and Ventilation
Proper placement is crucial for optimal performance. Position your Danby mini refrigerator on a level surface‚ away from direct sunlight and heat sources like stoves or radiators. Ensure adequate ventilation around the unit – at least 2 inches on the sides and back‚ and 1 inch above.
Restricted airflow can reduce cooling efficiency and increase energy consumption. Avoid enclosing the refrigerator in a tight space. Regularly check and clean the ventilation areas to prevent dust buildup;
Temperature Control Settings
Danby mini refrigerators typically utilize a dial or digital control for temperature adjustment. The dial settings usually range from 1 (warmest) to 5 or Max (coldest). Start with a mid-range setting and allow 24 hours for the temperature to stabilize.
For optimal food preservation‚ maintain a refrigerator temperature between 34°F and 40°F (1°C and 4°C). Adjust the setting as needed based on your specific requirements and ambient temperature.

Operating Your Danby Mini Refrigerator
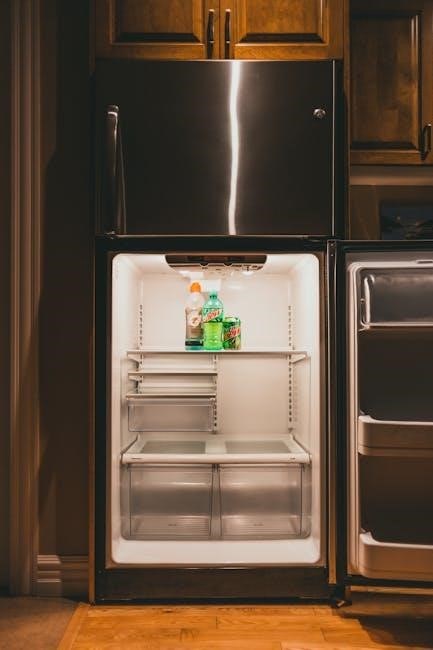
Danby models offer versatile storage‚ including freezer compartments‚ adjustable shelving‚ and reversible doors for customized organization and convenient access to contents.
Using the Freezer Compartment
Danby mini refrigerators with freezer compartments provide convenient frozen storage‚ though capacity varies by model. The 4.7 cu. ft. models feature a 1.5 cu. ft. freezer‚ while others‚ like the 4.2 cu. ft. top-mount‚ have a full-width section.
Avoid overfilling; allow for air circulation. For optimal freezing‚ pre-chill items before placing them inside. Regularly check for ice buildup and defrost as needed to maintain efficiency. Proper organization maximizes space and accessibility.
Adjusting Shelves and Storage
Danby mini refrigerators offer adjustable shelving to customize the interior layout. Many models‚ such as the 4.2 cu. ft. top-mount‚ include full-width and half-width shelves for flexible storage. Carefully lift and reposition shelves into desired slots.
Maximize space by utilizing door compartments for condiments and smaller items. Proper arrangement ensures efficient use of available space and easy access to frequently used contents.
Door Operation and Reversal
Danby mini refrigerator doors are designed for smooth opening and closing‚ ensuring a tight seal to maintain consistent temperatures. Some models feature reversible doors‚ allowing adaptation to kitchen layouts.
To reverse the door‚ consult your specific model’s manual for detailed instructions‚ typically involving hinge adjustments and screw repositioning. Ensure the door closes securely after reversal to prevent energy loss.
Maintenance and Cleaning
Regular cleaning and defrosting are crucial for optimal performance. Wipe spills immediately and periodically clean the interior with a mild detergent solution.
Regular Cleaning Procedures
To maintain your Danby mini refrigerator‚ unplug it before cleaning. Remove all contents‚ including shelves and drawers‚ and wash them with warm‚ soapy water. Wipe down the interior surfaces with a baking soda and water solution to neutralize odors. Clean the door seals to ensure a tight closure. For the exterior‚ use a stainless steel cleaner if applicable‚ or a mild detergent. Avoid abrasive cleaners that could damage the finish. Remember to thoroughly dry all parts before reassembling and plugging the unit back in.
Defrosting the Freezer
If ice buildup occurs in the freezer compartment‚ manual defrosting is required. Unplug the refrigerator and remove all items. Leave the freezer door open to allow the ice to melt naturally – this may take several hours. To speed up the process‚ place bowls of warm water inside. Once defrosted‚ thoroughly dry the interior before plugging the refrigerator back in and restocking it with food.
Replacing the Light Bulb
To replace the light bulb‚ first disconnect the refrigerator from the power outlet. Locate the light bulb cover within the refrigerator compartment and carefully remove it. Unscrew the old bulb and replace it with a new bulb of the correct wattage‚ as specified in your model’s manual. Reattach the cover and restore power.
Troubleshooting Common Issues
Common problems include cooling failures‚ excessive noise‚ and door seal issues; consult your Danby manual for diagnostic steps and potential solutions.
Refrigerator Not Cooling
If your Danby mini refrigerator isn’t cooling‚ first verify the temperature control setting isn’t set too warm or turned off. Ensure the unit is plugged in and the outlet is functioning correctly. Check for blocked vents inside‚ hindering airflow. A buildup of frost in the freezer can also restrict cooling; defrosting may be necessary. If issues persist‚ consult the manual’s troubleshooting section or contact Danby support for assistance‚ as compressor or refrigerant problems require professional attention.
Excessive Noise
Unusual noises from your Danby mini refrigerator could indicate several issues. Ensure the unit is level; an uneven surface can cause vibrations. Check if items inside are rattling against each other or the walls. The compressor running is normal‚ but loud or continuous humming warrants investigation. If the noise persists‚ consult the manual for troubleshooting steps or contact Danby support‚ as it might signal a mechanical problem requiring professional repair.
Door Seal Problems
Compromised door seals lead to temperature inconsistencies and increased energy consumption. Inspect the seals for cracks‚ tears‚ or debris. Clean the seals regularly with mild soap and water to ensure a tight closure. To test the seal‚ close the door on a piece of paper; if it pulls out easily‚ the seal may need replacing. Refer to your Danby manual for specific replacement instructions or contact customer support.

Safety Precautions
Always ensure proper electrical grounding and avoid overloading circuits. Follow usage guidelines‚ and keep flammable materials away from the refrigerator for safe operation.
Electrical Safety
To prevent shock‚ never operate the refrigerator with a damaged cord or plug. Always plug directly into a grounded outlet; avoid extension cords. Disconnect the appliance before cleaning or servicing. Ensure the voltage matches the refrigerator’s specifications. If the power cord is damaged‚ it must be replaced by a qualified technician. Improper grounding can create a risk of electrical shock‚ so verify proper installation; Regularly inspect the cord for wear and tear‚ and address any issues promptly for continued safe operation.
Proper Usage Guidelines
Avoid overloading the refrigerator‚ as this hinders cooling efficiency. Do not store hot foods directly inside; allow them to cool first. Keep the door closed as much as possible to maintain consistent temperatures. Regularly check the door seal for proper closure. This unit is designed for indoor use only‚ away from direct sunlight and heat sources. Ensure adequate ventilation around the appliance for optimal performance and longevity. Follow these guidelines for reliable operation.
Child Safety Considerations
Supervise children when near the refrigerator‚ preventing them from climbing or playing with it. The door could pose an entrapment hazard if left open for extended periods. Do not allow children to store items inside without adult supervision. Ensure the appliance is stable and cannot tip over‚ potentially causing injury. Keep packaging materials away from children to avoid suffocation risks. Prioritize safety to protect young ones.
Specific Model Features (4.7 cu. ft. Models)
Danby’s 4.7 cu. ft. models boast a dual-door design‚ black stainless steel finish‚ and ENERGY STAR certification for efficient cooling and storage.
Dual-Door Functionality
Danby 4.7 cu. ft. models feature a convenient dual-door design‚ separating the refrigerator and freezer compartments. This configuration enhances organization and minimizes cold air loss when accessing either section. The separate doors allow for efficient storage of both chilled items and frozen goods‚ optimizing space and maintaining ideal temperatures. This design is particularly useful for rec-rooms and offices where both cooling and freezing capabilities are desired in a compact footprint‚ offering a practical solution for varied storage needs.
Black Stainless Steel Finish
Danby’s 4.7 cu. ft. models are available with a sleek black stainless steel finish‚ offering a modern and sophisticated aesthetic. This durable coating resists fingerprints and smudges‚ maintaining a clean appearance with minimal effort. The black stainless steel complements a variety of décor styles‚ adding a touch of elegance to any space. It’s a stylish upgrade over traditional stainless steel‚ providing a unique and contemporary look for your mini refrigerator.
Energy Star Certification
Danby prioritizes energy efficiency‚ and many of their mini refrigerators‚ including the Designer 4.4 cu. ft. model‚ are Energy Star certified. This certification signifies that the appliance meets strict energy efficiency guidelines set by the EPA. Consumers benefit from reduced energy consumption and lower electricity bills. Choosing an Energy Star model demonstrates a commitment to sustainability and responsible appliance ownership‚ minimizing environmental impact.

Specific Model Features (7.4L Models)
Danby 7.4L models boast a built-in mirror‚ integrated LED lighting‚ a digital display‚ and touch controls for convenient operation and style.
Mirror and Light Integration
Danby’s 7.4L mini fridge uniquely integrates a full-length mirror into its door design‚ offering practical functionality alongside refrigeration. Complementing this feature is an internal LED light‚ illuminating the compact interior for easy visibility of stored items. This combination provides convenience – a quick self-check before heading out – and enhances the user experience‚ making it ideal for bedrooms‚ dorms‚ or personal spaces where both style and utility are valued. The LED ensures efficient lighting without significant energy consumption.
Digital Display and Touch Controls
Danby’s 7.4L models boast a modern digital display‚ providing clear and accurate temperature readings at a glance. Intuitive touch controls allow for effortless temperature adjustments‚ eliminating the need for traditional dials or knobs. This streamlined interface enhances usability and adds a sophisticated aesthetic to the compact refrigerator. Precise temperature management ensures optimal food and beverage preservation‚ while the digital display offers convenient monitoring.
Compact Size and Portability
Danby’s 7.4L mini fridge excels in space-saving design‚ making it ideal for dorms‚ offices‚ or bedrooms. Its remarkably small footprint allows for versatile placement without sacrificing cooling capacity. Despite its compact nature‚ the unit remains surprisingly portable‚ enabling easy relocation as needed. This convenient feature ensures chilled refreshments are always within reach‚ wherever life takes you.
Specific Model Features (4.2 cu. ft. Models)
Danby’s 4.2 cu. ft. models boast a top-mount design‚ stainless steel exterior‚ and adjustable shelving for optimized storage within a compact footprint.
Top Mount Refrigerator Design
Danby’s 4.2 cu. ft. models utilize a top-mount refrigerator design‚ strategically placing the freezer compartment above the fresh food section. This configuration maximizes accessibility to frequently used refrigerated items‚ reducing bending and streamlining daily use. The layout efficiently utilizes space‚ offering a practical solution for smaller environments like apartments or offices. This design balances both freezing and refrigeration capacity within a compact footprint‚ providing versatile storage options for various food and beverage needs.
Stainless Steel Exterior
Danby’s 4.2 cu. ft. compact refrigerator boasts a sleek stainless steel exterior‚ adding a touch of modern elegance to any space. This durable finish resists fingerprints and blends seamlessly with various kitchen decors. Beyond aesthetics‚ stainless steel offers enhanced longevity and ease of cleaning‚ maintaining a pristine appearance with minimal effort. It’s a stylish and practical choice for those seeking a sophisticated appliance.
Adjustable Shelving Options
Danby’s 4.2 cu. ft. model features adjustable shelving‚ providing customizable storage solutions to accommodate items of varying heights. The configuration includes two full-width and one half-width adjustable shelf‚ maximizing interior space and organization. This flexibility allows users to easily store larger containers or create dedicated zones for different food types‚ optimizing convenience and accessibility within the refrigerator.
Specific Model Features (4.4 cu. ft. Models)
Danby’s 4.4 cu. ft. Designer models are all-refrigerators‚ Energy Star efficient‚ and boast a sleek aesthetic‚ ideal for convenient chilled beverages.
All-Refrigerator Design
Danby’s 4.4 cu. ft. Designer models distinguish themselves with an all-refrigerator design‚ eliminating the need for a separate freezer compartment. This configuration maximizes usable refrigerated space‚ providing ample room for beverages‚ snacks‚ and other perishables. This is particularly beneficial for those who don’t require dedicated freezer storage within their compact refrigerator.
Energy Star Efficiency
Danby’s Designer 4.4 cu. ft. compact refrigerator boasts Energy Star certification‚ signifying its commitment to energy conservation. This means the appliance meets strict energy efficiency guidelines set by the EPA‚ resulting in lower energy bills and a reduced environmental impact. Consumers can enjoy chilled convenience responsibly‚ knowing their refrigerator operates efficiently.
Designer Aesthetic
Danby’s Designer 4.4 cu. ft. compact fridge isn’t just functional; it’s designed to enhance any space with its sleek and modern appearance. Available in stylish black‚ it seamlessly integrates into various décor styles. This all-refrigerator model offers a sophisticated look‚ proving that compact appliances can also be visually appealing and elevate the ambiance of any room.

Warranty Information
Danby mini refrigerators come with a warranty covering parts and labor for a specified period‚ ensuring peace of mind for owners.
Coverage Details
Danby’s warranty typically covers defects in materials and workmanship under normal residential use. The length of coverage varies by model‚ often including one year for parts and labor‚ and potentially longer periods for the sealed system (compressor‚ condenser‚ evaporator).
This warranty doesn’t cover damage from misuse‚ accidents‚ improper installation‚ or commercial use. It’s crucial to register your appliance to validate warranty coverage and streamline any potential claim processes. Always retain proof of purchase for warranty verification.
Claim Process
To initiate a warranty claim‚ contact Danby customer support via their website or phone number‚ providing your model number‚ serial number‚ and proof of purchase. A representative will guide you through troubleshooting steps and‚ if necessary‚ authorize repair or replacement.
You may be required to submit photos or videos documenting the issue. Danby will arrange for a qualified technician to assess the problem‚ and approved repairs will be completed at no cost to you during the warranty period.

Contacting Danby Support
Danby provides comprehensive support through its official website‚ offering online resources and FAQs. Direct assistance is available via phone and email.
Website and Online Resources
Danby’s official website (Danby.com) serves as a central hub for product information‚ including downloadable manuals for various mini refrigerator models. Users can access detailed specifications‚ frequently asked questions‚ and troubleshooting guides. The site also features a robust support section where customers can register their appliances for warranty purposes and find helpful tips for optimal performance. Furthermore‚ Danby often provides instructional videos demonstrating setup‚ cleaning‚ and basic maintenance procedures‚ enhancing the user experience and self-service capabilities.
Phone and Email Support
Danby provides dedicated customer support channels for assistance with their mini refrigerators and manuals. Customers can reach their support team via phone for immediate help with troubleshooting or warranty inquiries. Alternatively‚ email support offers a convenient method for submitting detailed questions or concerns‚ allowing for a more comprehensive response. Danby aims to provide prompt and helpful assistance‚ ensuring customer satisfaction and resolving any issues related to product operation or manual understanding.